Lost Exo-Realm: Columpio with Drepan (LER-01) by Fansproject, Part 1

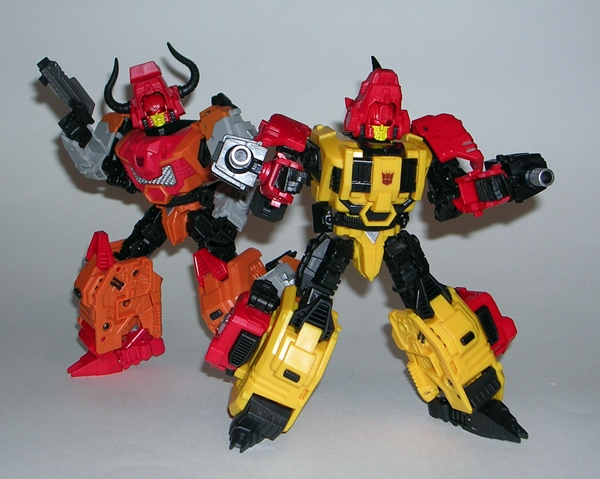
Not-Dinobots… everybody is doing them!!! Yes, folks, these days if you’re in the market for pricey third-party versions of the Dinobots you have a lot of choices. And unless you have all the monies and display space in the world, you’re going to have to do some serious research and make some serious choices. Some are Masterpiece sized, some are Voyager sized, some are even combiners! In the end, I went with Fansproject’s Lost Exo-Realm series, mainly because… hey, it’s Fansproject! I’ve got a couple of shelves full of their toys and these guys have never disappointed me. The other reason I went with the LER Dinos is because they are doing their own Not-Grimlock and it’s really important to me to get a matched set of all of them in the same size and style. Their first release is Columpio, aka Not-Sludge. I’m featuring this guy in two parts, because there’s a lot to talk about and it’s too much for me to accomplish in just one day. Today, we’ll look at the packaging, the dino mode, and his little buddy Drepan, and tomorrow we’ll look at his robot mode and get more into his weapons. Let’s go!

colum1

colum2

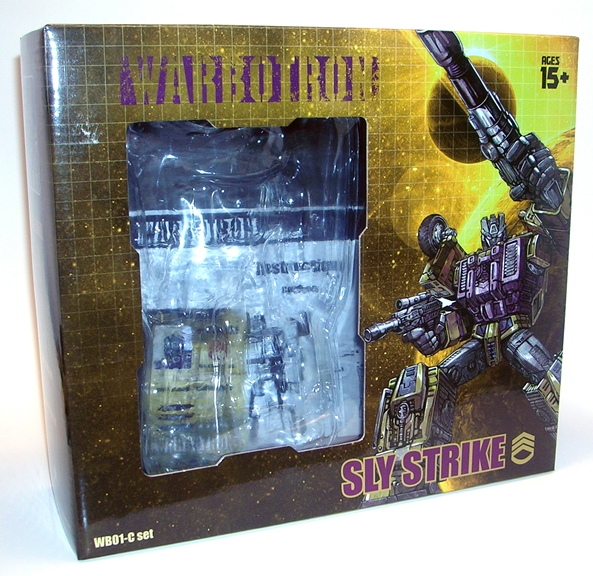
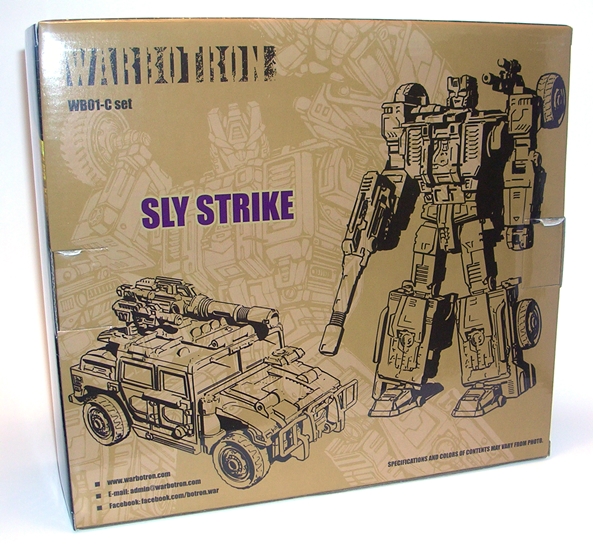
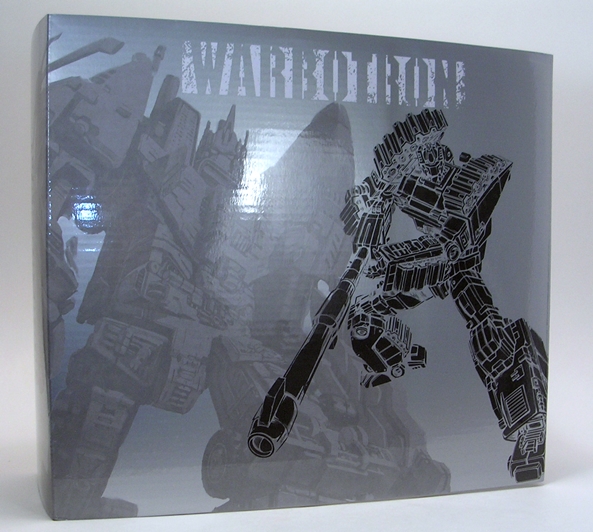
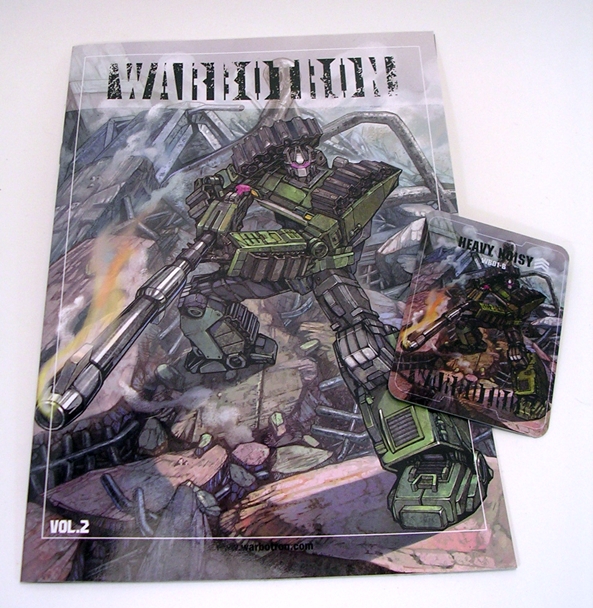
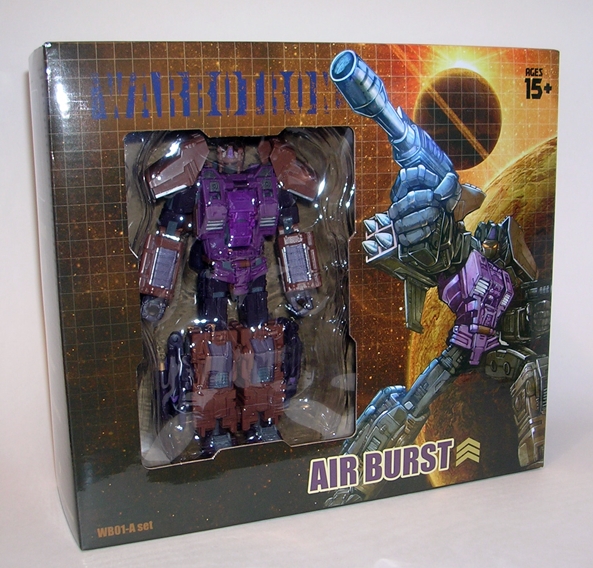
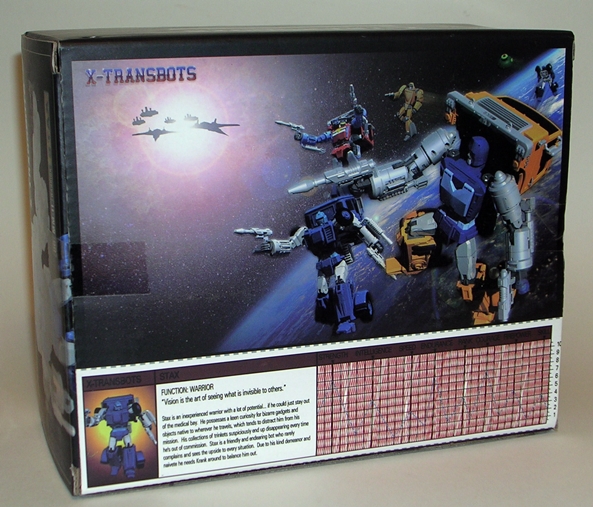
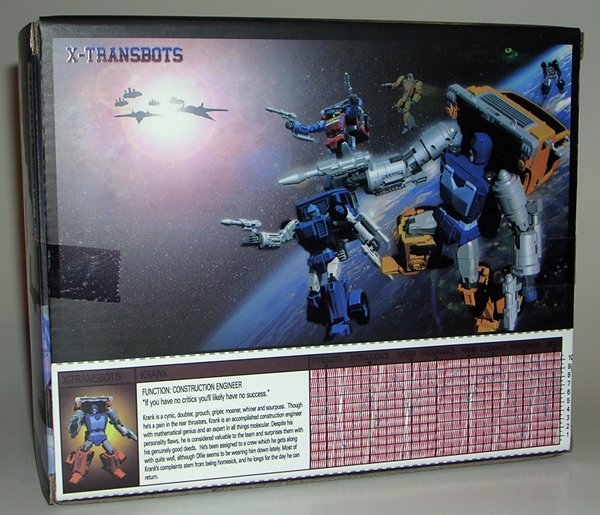
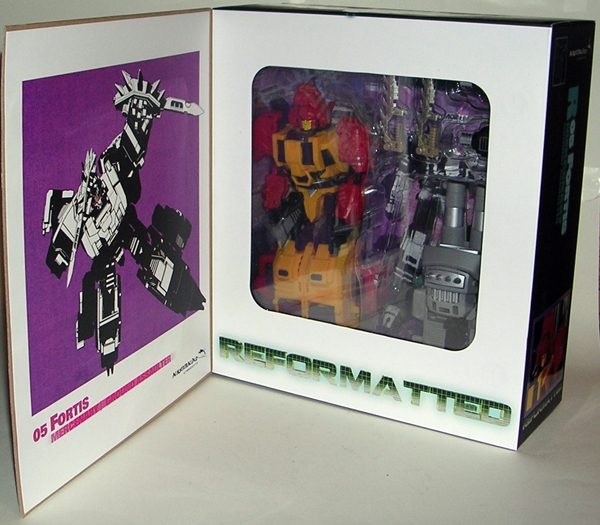
Ahh, this is some amazing packaging! Columpio comes in a rather large, landscape orientated box with a front flap that opens upward and is secured with velcro. The entire box has a nice matte finish and is loaded with artwork. The front panel features a bitchin piece of character art with Columpio in robot mode wielding Drepan in his weapon mode. The back of the box shows photos of the toy in both modes.

colum3

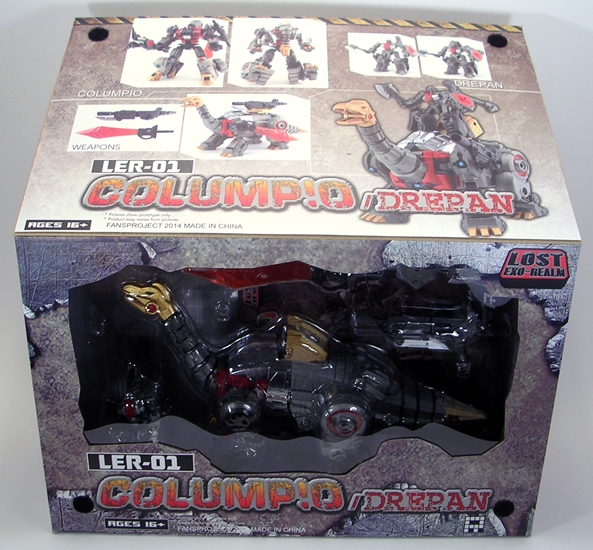
Open the flap and you get a die-cut window that looks like you’re viewing the figure inside through a cave entrance. The inside of the flap has more shots of what you’re getting inside the box. Columpio comes packaged between two clear plastic trays in his dino mode with Drepan in his robot mode and all the weapons laid out around them. While I frequently toss the boxes to many of my “over-the-counter” toys, I always save the packages for my third-party convert-o-bots, and while it tends to take up a lot of room, it’s presentation like this that makes it worthwhile.

columpgng2

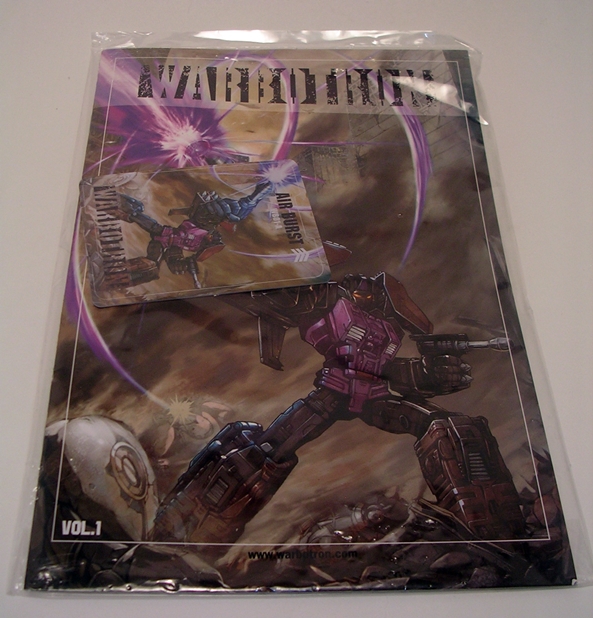
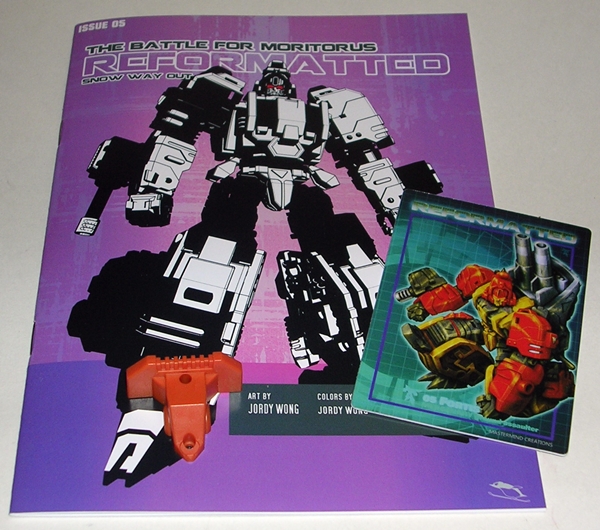
On the other hand, Fansproject seems to have poured all their efforts into the box and not much into the ephemera. There’s no profile card or comic book. You only get a three page color instruction “booklet” and the middle page isn’t even stapled inside. I’m not really complaining, but some folks who look forward to those little extras may be disappointed. Let’s start off with his dino mode.

colum5

colum6

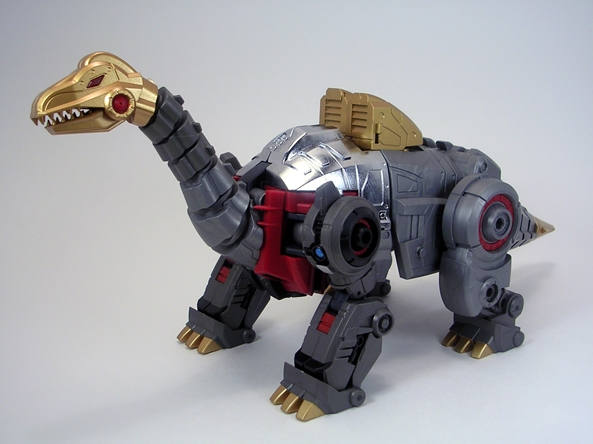
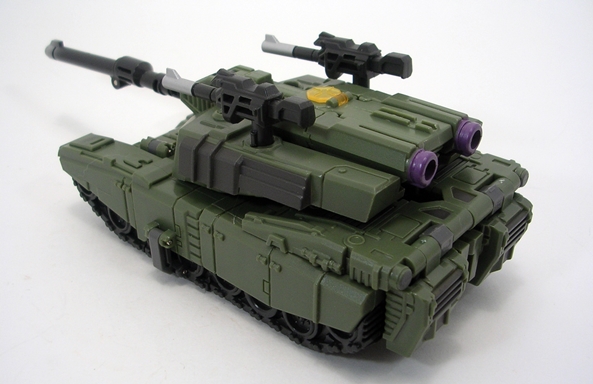
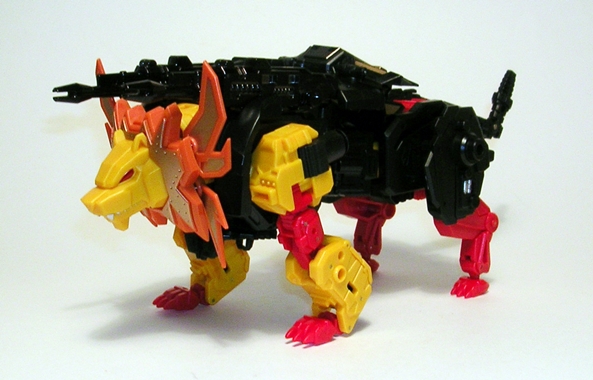
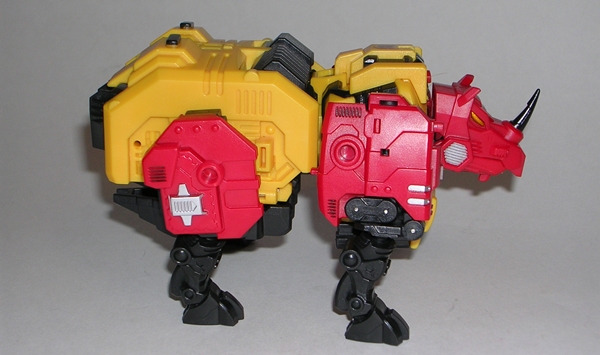
And here is Columpio in all his Dino Mode glory. When I was a kid, this dino mode was known as a Brontosaurus, but I guess that’s not considered scientifically accurate anymore and Apatosaurus seems to be the accepted name these days. Why? Because science! Either way, Columpio is a four-legged cybernetic behemoth with a long snake-like neck. I don’t usually start with the deco, but in this case it’s worth pointing out that the initial con exclusive release had vac metal gold, whereas this regular retail release gets by with just gold paint. I say “gets by” but in person the regular gold paint on display here is pretty damn sumptuous looking. It’s got a sexy satin finish and it is beautifully applied. I think in the end the question of which deco is superior will come down to a matter of personal taste, although the exclusive con version will always have that special level to gravitas to it. Personally, I like what we got here and he still manages to sport some bling via the metallic silver paint on the plates behind his neck, just like on the original G1 toy. The rest of Columpio is comprised of a nice gray plastic with some black, red, and a little blue showing here and there. The coloring definitely delivers on the G1 vibe that I was looking for. I couldn’t be happier with the way this deco turned out.

colum7

colum17

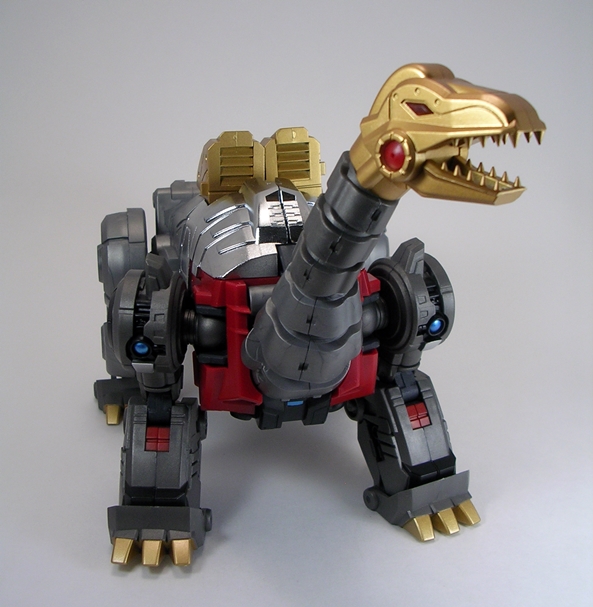
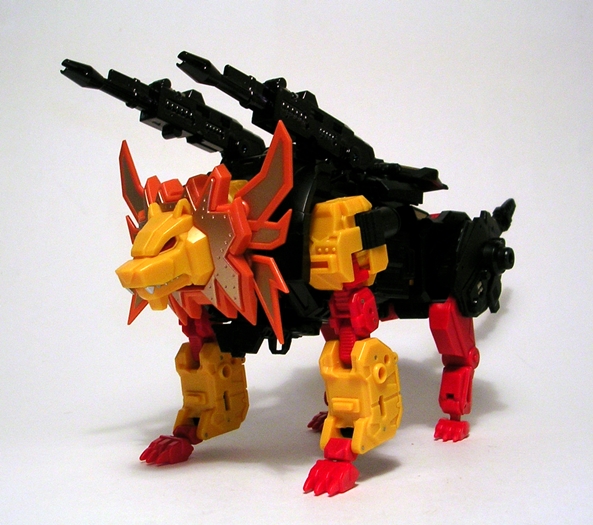
As for the sculpt, there are some great panel lines and vents and whatnot to accentuate his cybernetic form. The gold vent pieces on his back are more prominent than the original G1 toy, but they serve a purpose that we’ll get to in a bit. The legs on this guy are wonderfully proportioned and feature excellent articulation, which includes some lateral movement in the “shoulders” and hinges in the “knees.”

colum8

colum14

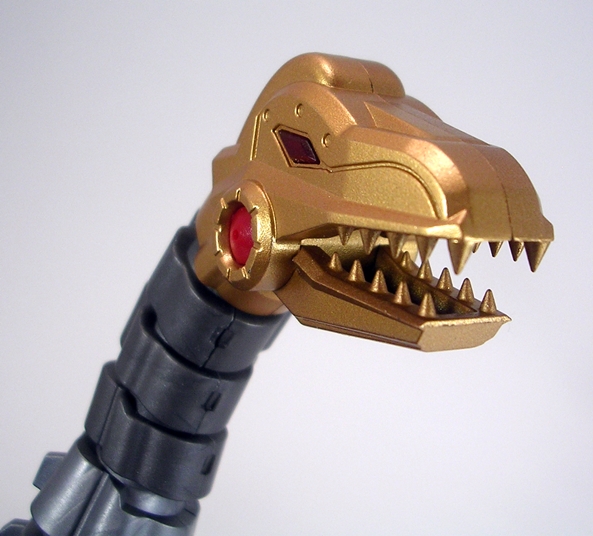
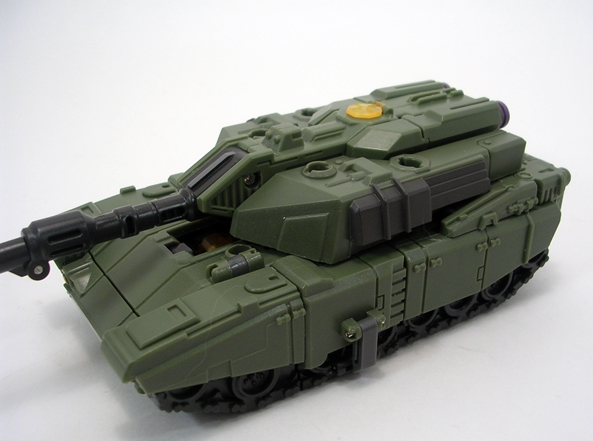
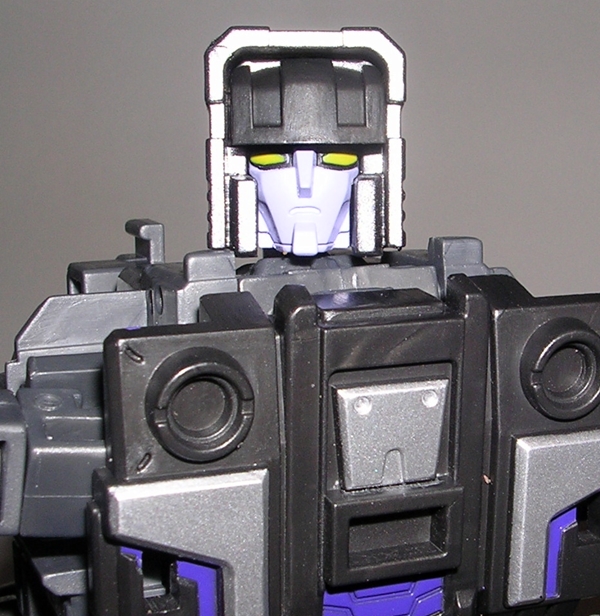
The head sculpt features some nice personality to it, at least for a robot dinosaur. The eyes are red and there are matching discs embedded in his jaw hinges. The mouth does open revealing not a whole lot inside other than his sharp teeth. Of course, one of my favorite things about this guy is the design of the neck. It’s segmented with joints between each, allowing for a beautiful degree of poseability.

colum11

colum12

Moving on to Drepan, Columpio’s little buddy and homage to the old Diaclone pilots that came with the original releases of these molds. Fansproject went the extra step and they’re making these little robots transform into weapons for their Dino-formers. He’s a bit bigger than I expected and a very nice sculpt. He’s also very nicely articulated with ball joints in the shoulders and hips and double hinges in the knees and elbows. His head can even rotate. On the downside, Drepan has a huge handle coming off his back. I did not expect that and it’s rather disappointing. Of course, let me qualify that by saying that these partner robots were not a big selling point for me and the LER line, so when I say that huge protuberance disappoints me, it’s not really putting me off my purchase and I still kind of dig Drepan for what he is.

colum13

And hey, this little guy even comes with his own little axe and shield. The axe fits into the hole in either of his hands and the shield can peg right onto his arm. All in all, Drepan is well thought and a lot of fun and as we’ll see tomorrow he can transform into a pretty cool weapon.

colum9

Drepan can also ride on Columpio’s back and that’s where those vents come into play. They can rotate around to make a pilot seat for the little guy. It works OK, but if I ever display Columpio in dinosaur mode, Drepan will probably be chilling out back in the box.

colum15

colum16

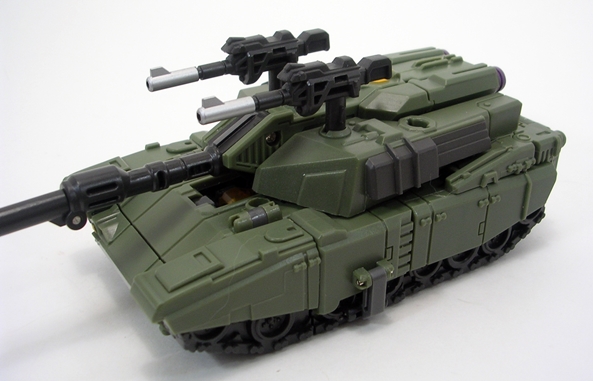
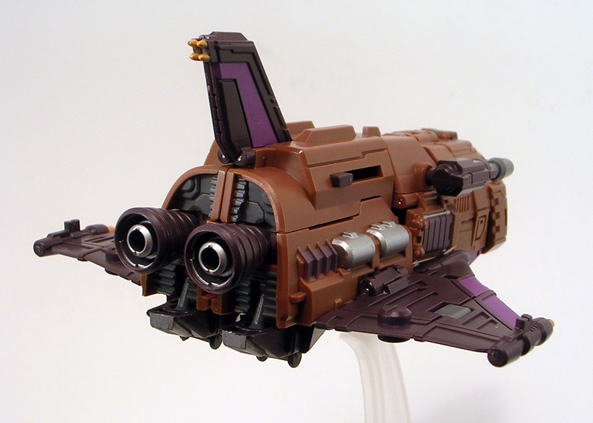
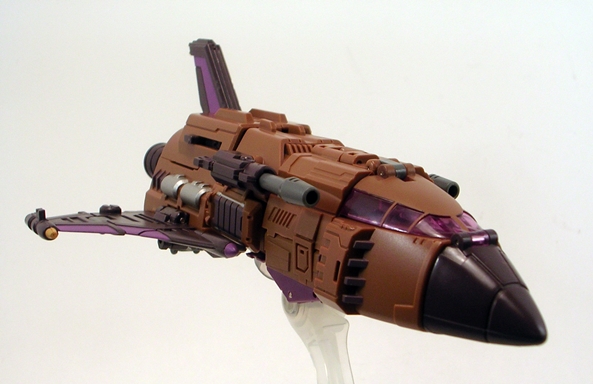
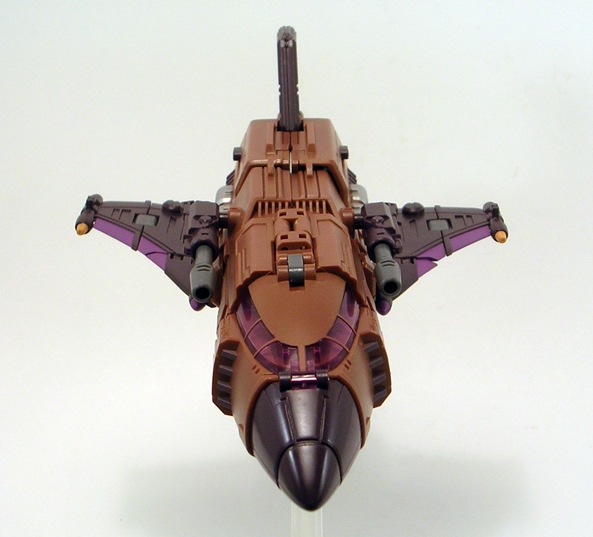
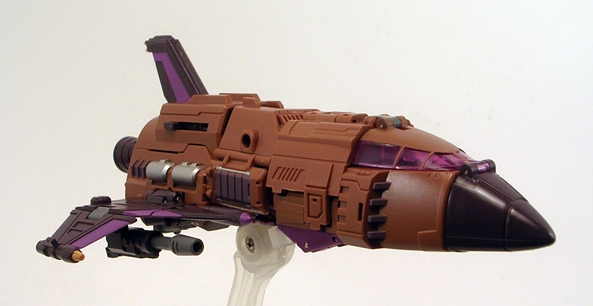
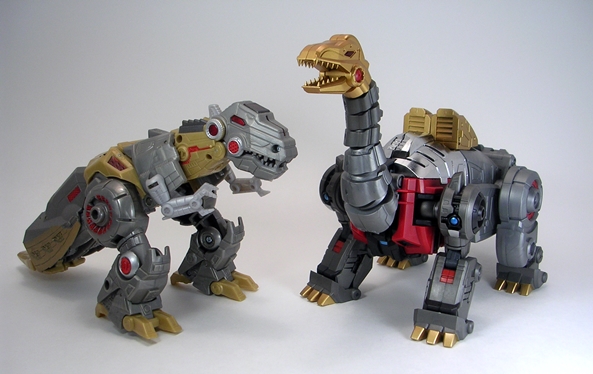
While I’ll be dealing with his weapons more tomorrow, I did want to just point out that Columpio’s gun and sword will attach to his dinosaur mode very much in the way Hasbro’s Generations Grimlock’s accessories attached to him. I’m not a big fan of this as a display option, but it’s a nice option to have nonetheless.

colum19

colum10

And that’s where I’m going to call it quits for today. So far Columpio is hitting all the right points. His Dino Mode looks great and is lots of fun to play with. Tomorrow we’ll get Columpio transformed and check out his robot mode and other goodies!


Warbotron: Sly Strike (WB01-C) by Warbotron

Lest anyone forgot, I’m currently in the middle of collecting two third-party combiner teams. MMC’s Feral Rex (Not-Predacons) seems to have stalled after the third release with Talon trickling in to almost every e-tailer but the one I pre-ordered him from. Dammit! Fortunately, on the other side of the fence, Warbotron’s homage to the Combaticons has been going full guns (pun intended!) and the third entry in that team, Sly Strike, just showed up on my doorstep. Sly is the figure in this series that I was most excited for, as he is an homage to one of my favorite Decepticons, Swindle. In fact, it wouldn’t be totally off base to say that this figure is the reason I decided to collect this team in the first place. Let’s see how he turned out…

warbsly1

Once again, Warbotron’s presentation is absolutely superb. The figure comes in a satisfyingly large box with a snazzy silver sleeve that’s decked out with some nice line art and the name “Warbotron.”

warbsly2

warbsly3

Lift off the sleeve and you’re treated to a colorful window box with a G1-inspired grid pattern and some truly gorgeous character art of Sly. The half window lets you see the figure, packaged in robot mode, and conceals his guns, which are off to his left. In addition to the figure and the two weapons, you also get a colorful profile card and a folded instruction sheet. Yes, it seems as if Warbotron has abandoned the comic book and instruction combination that they included with the first two figures. I’m generally not a fan of companies mixing things up in mid- stream, it musses with my OCD, but I can’t say that we’re losing much with them dropping the comic. It was mainly unintentionally entertaining because of the poor translation. Alright, y’all know the drill by now. I’m going to start off with Sly Strike’s alt mode.

warbsly4

Of the three figures released in this team so far, Sly Strike’s alt mode represents the biggest departure from the original Transformer toy. Like Blast Off, Air Burst was a space shuttle and like Brawl, Heavy Noisy was a tank. No longer an army Jeep, Sly Strike has been upgraded and modernized to an desert-style armored Humvee. I can’t say I was entirely in favor of the change at first, but I’ll concede that this design gave them a lot more to work with in order to deliver a better looking robot. But we’ll get to that in a bit. First let’s take a further look at this alt mode…

warbsly5

Warbotron has been delivering some pretty nice, realistic styled alt modes and Sly keeps that trend going. In fact, I’d say in terms of sculpted detail Sly Strike comes out tops so far. There’s not much area on this vehicle where there isn’t some kind of added detail. Whether it be the vents on the hood, the armored plates on the doors, the grab rails on the back, or even the suspension in the wheel wells. Some of the finer points, for example the lights on the roof, are little more than painted nubs, but they still get the job done. As many know, I’m not generally a fan of painted windows, especially on realistic alt modes, but in this case I don’t think Warbotron had much of a choice due to the engineering at play and I’m prepared to cut them some slack.

warbsly6

Aside from the windows, Warbotron uses paint hits sparingly and mostly lets the colored plastic carry the day. I’m a big fan of this practice, especially for military style vehicles where decos tend to be drab by nature. The tan plastic looks great and you do get some silver and red apps here and there along with a little blue and black. All the paintwork is applied with precision.

warbsly7

There are a number of visible seams and hinges on the Humvee, but because of the rather utilitarian nature of the vehicle’s design, I don’t think they mar the aesthetics of the toy at all. And while we’re on the subject, I really appreciate the way this alt mode locks together. The doors alone, for example, have three hinges in them, but the entire assembly either pegs or tabs comfortably in three different places. Just about every shifting part ultimately secures itself in one way or another.

warbsly8

warbsly9

Sly Strike features two ports on top to peg in his weapons. The only real customization here is which one you want on the right or left, or whether you want to leave them off entirely.The guns certainly detract from the realism here, but I can’t say as I don’t like the look of them.

warbsly11

warbsly20

Transforming Sly Strike for the first time was pretty challenging. I was able to convert Air Burst and Heavy Noisy without even looking at the instructions, but that wasn’t the case here. Sly is easily the most complex of the three figures so far and the engineering does some interesting things. I’ll note here that once again the plastic has a high quality feel to it. The parts move quite well with the only exeption being the hinge in the torso, which requires a bit of force to unpeg. The only piece that feels somewhat fragile is the ramming bar and it’s thankfully designed to unpeg from the front rather than break. It’s also worth noting that Sly Strike is the first in this line to not have vehicle parts removed during transformation. Only his guns come off. When all is said and done we get a robot mode that nicely straddles the line between originality and G1 homage. But before I get too deep into his robot mode, check this out…

warbsly10

One of the coolest elements of the design allows you to actually choose two different looks for his robot mode. You can leave the front of the vehicle as his chest, in a very traditional Autobot manner, or you can go the official route and fold it back behind him. I’ll likely display him with the official look, but I really like the other option quite a bit as well. It reminds me a bit of Alternator Swindle!

warbsly13

Clearly, Warbotron modeled most of Sly Strike’s robot mode after the G1 Swindle toy and not the animated version. The biggest giveaway is the purple chest rather than the windshield. While I certainly have a soft spot for the Sunbow version of Swindle, I can’t argue with the results here. He’s a fantastic looking robot with a few of Warbotron’s own flourishes, like the wheels on the shoulders, thrown in for good measure. The legs fill out nicely thanks to the addition of some hinged plates, and the ball jointed ankles let you get all sorts of wide stances without compromising Sly’s stability.

warbsly12

I’ve been pretty happy with the head sculpts in this line so far. Air Burst and Heavy Noisy weren’t exactly brimming over with personality, but they certainly looked the part. That having been said, Sly Strike’s is easily my favorite portrait in the series. Just look at that face. He’s a smarmy asshole through and through and it’s perfect. And that light piping? Magnifcent!

warbsly16

warbsly15

Naturally, Sly’s roof mounted weapons become his guns, which he can hold in both hands. The pictures on the package show the pistol worn on his shoulder, but it’s rather misleading. There is indeed a screw hole on each of his shoulders and the peg on the pistol does fit it, but it doesn’t feel like it was meant to and it’ll fall right out without much provocation. I’ll also mention here that I think it was a HUGE missed opportunity to not have a way to mount his rifle as an arm cannon. I know they’re doing their own thing with the design. And I know they’re modeling more from the toy than the cartoon, but animated G1 Swindle’s arm cannon is rather iconic to me and it would have been really easy to pop a tab or something on there to make it work. Ah well!

warbsly17

warbsly14

warbsly19

warbsly18

I had very high expectations for this release and in the end, I’m extremely pleased with how Sly Strike turned out. The Humvee mode totally wins me over and while I still would have liked a figure based more on the Sunbow design than the original toy, I can’t argue with the results. This toy feels solid, has great engineering, and is lots of fun to play with. What’s more he looks fantastic when displayed beside his two Not-Combaticon comrades and he scales quite well with the Masterpiece Transformers too!

warbsly23

warbsly21


warbsly22

At about $90 each these chunky Voyager sized figures continue to feel like decent values, at least in the Third-Party Transformer market. I’ve yet to have any regrets about investing in this set and with only two more releases to go, Warbotron would have to stumble pretty badly to blow it now. Releases have been a bit erratic, but Warbotron’s Not-Vortex (I don’t think we’ve seen his official name yet) should be hitting sometime in the next month!

Warbotron: Heavy Noisy (WB01-B) by Warbotron

It seems like quite a while since I looked Air Burst, the first release in Warbotron’s Not-Combaticons series. Well, now it’s time for the second entry in the line. His name is Heavy Noisy and he is most certainly not Brawl. I’ve got a lot to cover with this guy, so let’s dive right in…

warbhnbx1

warbhnbx2

warbhnbx3

Warbotron’s presentation with this line is pure money. Sure, there’s some pretty bad spelling here and there, but let’s just call that a little colorful charm in an otherwise kick-ass package. There’s a beautifully illustrated monochrome sleeve that lifts off to reveal a colorful window box with a grid pattern that vaguely reminds me of the packaging used on some other brand of change-bots. Some bitchin character art and a nice look at the figure in his robot mode and you’ve got a box that is definitely a keeper. Inside the box, you get the figure and his accessories, a colorful profile card, and a comic book-slash-instruction manual combo. Did I mention how much I love his name? Heavy Noisy! It’s just fun to say. Let’s start off with his alt mode…

warbhn1

warbhn2

As expected, Heavy Noisy’s alt mode is a tank and I think it works great as an update to the Basic G1 Brawl’s mode. I don’t think it’s patterned after any specific real world tank, but it certainly looks credible enough. The main body features static, sculpted faux treads and everything is packed together into one tight, solid brick. There are four indented shapes on the front of the tank which require you to insert some plugs to fill them in. They’re not screw holes, so I’m not sure why they did this, but it’s similar to the plugs included on a couple of TFC’s Uranos figures. Warbotron didn’t go overboard with the detail on the chassis, but there’s certainly enough here to make it look good.

warbhn4

warbhn5

warbhn6

The turret is a separate piece that plugs into the chassis, as detaching it is part of the transformation. When completely pegged in it does turn a little bit to the left and right and if you pull it up slightly you can get a better range of motion out of it. The gun, however does not raise or lower. Again, there’s some nice detail sculpted into the turret, but nothing outrageously complex. There’s a translucent yellow flip up sight, but I think that’s designed more for use as Heavy Noisy’s gun. We’ll get to that in a bit. Speaking of guns, there are two guns to peg into the top of the turret and four peg holes to choose from, allowing for just a little bit of customization. I’ll also point out here that the plastic feels great and is right in line with the stuff used for Air Burst. I also didn’t run into any QC issues at all.

warbhn3

Heavy Noisy’s tank mode gets by with very minimal paint apps. It’s molded in green and black plastic, which works great for its military deco. There are a couple purple paint hits on the back of the turret and some silver on the tips of the guns and the main cannon. There’s a little more paint on the front of the tank and the grates on the back. In this case, I think less is more as the toy has a very clean and utilitarian look appropriate for a tank.

warbhn7

Transforming Heavy Noisy is surprisingly simple, although it does require you to remove the turret, which can be repurposed as the robot’s guns and shield, or you can re-attach the gun to his back. I realize that parts-forming pisses some people off, I’m not generally fond of it, but I think in this case calling it parts-forming is a bit of a stretch. It’s fairly similar to Air Burst’s rocket packs coming off and it seems like it might be a running design element in this team. I’m perfectly fine with it. I also should note here that collapsing and extending Heavy Noisy’s arms are the only thing that gave me trouble and I need to give a shout out to Youtube Reviewer Rob A for recommending in his excellent video review that a little twist of the screws is all that’s needed to make this step easy-peasy.

warbhn10

warbhn11

Heavy Noisy’s robot mode borrows a bit from the original Hasbro toy and a bit from the Sunbow design and tosses in some elements of his own. I think the result is pretty spectacular. This is precisely the kind of boxy and angular Transformers design that I love the most. I particularly dig the way the front of the tank forms his chest in a way that mimics the traditional Autobot car style. When wearing part of the turret on his back, the cannon folds down but still peaks up behind his head just like on the G1 character. He’s just every bit a love letter to the old classic design elements and that’s exactly what I’m looking for in my G1 character updates.

warbhn24

The treads look great as his extended shoulders and the headsculpt is simple and yet oh so good. It really suits the character homage perfectly and sports some gorgeous yellow light piping. In robot mode, Heavy Noisy still retains most of his tank deco from the green and black plastic, although he does show off a lot more black to mix things up a bit. You also get some more grey and silver paint apps showing. He’s not as flashy as the purple and brown combo of Air Burst, but his color scheme definitely works perfectly for the intended character homage.

warbhn14

warbhn15

warbhn16

I’m not going to run down all of Heavy Noisy’s articulation. He’s got most of the same points as Air Burst, which means he’s got lots of poseability. On the downside, Heavy Noisy really stumbles in the shoulder articulation. The problem here is that there’s no clearance between his torso and his upper arms. They rotate just fine, but he just doesn’t have the dynamic lateral movement in the arms that Air Burst has. You can get them to point out and at an angle, but it’s rather awkward. Had Warbotron designed him so you could pull his arms out just a little bit, the problem would have been fixed, but as he is, he can’t do all the stuff I’d like him to do. Quite frankly if he didn’t look so damn awesome standing on the shelf, this would have been a much bigger problem for me.

warbhn17

warbhn12

warbhn13

As already mentioned, Heavy Noisy’s turret gets cannibalized for weapons. The figure is capable of holding or wearing everything all at once or you can mix and match for a number of display options. The two guns can be used as dual handguns and he looks great holding them. In fact, this is probably the way I’m going to display him on the shelf because it allows you to keep the cannon peeking up from behind his back. You can also use the top shell of his turret as a shield, by clipping it onto his arm and both guns will attach to the shield as well.

warbhn21

warbhn23

And that brings us to Heavy’s rifle. It requires just a wee bit of tinkering to put it into rifle mode and it is indeed a formidable looking piece of weaponry. Unfortunately due to a combination of the rifle’s design and Heavy’s arm articulation, there’s very little you can do with it except have him hold it in a relaxed position. The back of the rifle interferes with the treads on his biceps and because there’s so little lateral movement in the arms, I can’t get any kind of action poses with the rifle that I’m happy with. It feels like Warbotron needed to put a more thought into this idea, as I’m sure a little extra time on the drawing board could have made it work better. It’s not a big deal for me, since I prefer the rifle on his back and the pistols in his hands.

warbhn22

warbhn25

Still, with that having been said, there’s an undeniable appeal to posing him with rifle and shield. It gives him a certain armored-up Gundam quality that I can’t help but admire.

warbhn9

warbhn26

warbhn27

In the end Heavy Noisy is a solid figure with a couple of design issues. Everyone has their own pet peeves, so some of these issues are likely to be minor to some and glaring to others. For me, I’m so fond of his robot mode that I’m prepared to overlook the nagging issues. The cumbersome rifle doesn’t bother me, since I doubt I’d ever display him with it anyhow, but the shoulders remain a sore spot whenever I pick him up and play around with him. On the other hand, seeing him standing on the shelf next to Air Burst and knowing that Sly Strike (Not-Swindle) is coming next makes me very happy I’ve invested in this team.

Warbotron: Air Burst (WB01-A) by Warbotron

I made a little promise to myself this year that I would cool it on the Third-Party combiners. After all, I’m still in the middle of completing MMC’s Not-Predaking. But I’ve been cautiously eyeing Warbotron’s Not-Combaticons ever since they showed off the first unpainted prototype. When the first figure in the series hit the retailers, I discovered what I probably already knew: When it comes to Transformers, I have the backbone of an eclair. In other words, my resolve crumbled and I bought in. There is an awful lot of controversy surrounding Warbotron and a certain temporary exclusivity deal signed with one retailer in particular. I’m not going to get into the politics and pitfalls of that quagmire. I’m just here to look at toys. And with that having been said, let’s take a look at Air Burst, who is of course, Not-Blast Off.

abwarb9

Air Burst’s package features some beautiful design and presentation. You get a silver sleeve with a very nice piece of artwork showing Air Burst in front of a ghostly image of the gestalt, Warbotron. The box is pretty big, but then Air Burst is a figure big enough to hang with MMC’s Feralcons. On the other hand, first impressions of the box might lead one to believe that there’s a bunch of extra stuff in there, like combiner parts, when there isn’t. All you get is the figure and his weapons. The combiner parts will come later.

abwarb10

abwarb11

Lift off the sleeve and you’re treated to a very colorful window box, which again features some bitchin artwork. The box shows off the figure in his robot mode and the weapons are concealed to the right. In addition to the figure you also get a profile card and a comic book with instructions. I love the artwork, but the comic translation is laughably bad. Granted, the comics and cards are never a big deal to me with these figures, but it seems like with all the work that the company put into the toy and the presentation, they could have had an editor look over the translator. I’m sure there someone out there would have done it for a free figure. Psst… Warbotron… Call me! Ok, enough about the packaging, let’s move take a look at Air Burst’s space shuttle mode.

abwarb12

abwarb14

I always thought that a space shuttle was an odd choice for a team of combat vehicles, but Air Burst’s beefy and armored looking shuttle mode really sells it. The overall silhouette matches that of the iconic NASA shuttles, but this one looks like it’s been uglied up to take a beating… and I mean that in every bit a good way. It’s a rugged looking ship with two giant laser cannons mounted on the sides, or you can reposition them under the wings if you prefer. I like to angle the wings down when the guns are on the wings. There is admittedly a lot of seams and hinges visible on the alt mode, but I think it just adds to the vehicles utilitarian and militaristic charm. The mostly brown coloring follows through on Air Burst’s military nature and the touch of Decepticon purple ties it all together. The shuttle mode doesn’t rely heavily on paint operations, but little touches like the painted yellow lights are welcome.

abwarb15

abwarb13

abwarb16

When properly transformed, everything on Air Burst’s shuttle mode locks together beautifully, but that often involves some fine tuning to get everything just right. I do have just a couple of minor gripes to toss out there. One, the hinges on the wings can be a little floppy. They hold fine until you bump them and then they tend to droop. The second issue involves the front landing gear. They were a real bitch to fold out and when they did finally come out, the tiny wheels dropped out of the clips. The clips don’t have enough tension to hold them in place, so I’ve decided I’m better off not bothering with the gear at all. It’s not worth messing with them and risking losing one of the wheels because they are visible on his chest in robot mode. Neither of these issues are crippling, nor do they really impact on my enjoyment of the toy.

abwarb4

abwarb5

In robot mode, Air Burst is a damn fine looking robot. There are definitely some liberties with the G1 design, most notably the addition of the shoulder armor, but I really dig him. Overall, the transformation is pretty straight forward. I’ve had him back and forth a bunch of times and there’s no evidence of any stress marks. The pivot where the feet rotate on was super tight at first and when I rotated the feet the first time, they shaved some plastic off the inside of the joint, which solved that problem all on its own. Now the feet rotate fine. The hands can be tough to fold out from the arms, and you have to have them positioned just right to fold back in. The plastic is very good quality and there aren’t any movements involved in the transformation that are anxiety inducing. Some people have reported having trouble repositioning the shoulders with the head getting in the way, but I didn’t have any such issues.

abwarb6

abwarb7

abwarb8

It is worth mentioning that a significant bulk of Air Burst’s shuttle mode is removed for transformation into robot. Some people may have a problem with that, but in Air Burst’s defense, they are used on the robot mode. The two back engines come off and can be used as arm mounted rocket pods if you want, but if you don’t want them on the arms, you can also keep them attached to what become his back legs. I kind of like this look because it bulks his legs out and adds the back fins as heel stabilizers, although it is admittedly a bit kibbly. Still, it’s a nice option for storing them if you want to give him a cleaner look on his arms.

abwarb1

abwarb2

abwarb3

In addition to the optional rocket packs for the arms, Air Burst can use his shuttle cannons as handguns. The guns are designed to telescope out and collapse, but I prefer them with the longer barrels in both robot and shuttle modes. And whether you prefer guns or rocket pods, or both, Air Burst is an amazingly fun figure to pose. He’s brimming with useful articulation and the joints are solid and hold really well. I paritcularly love the tight ball joints in the ankles that give him the ability to maintain a flat foundation in all sorts of action poses. The thruster cones act well as stabilizing heels and it’s in the action poses where you probably want to not have the extra bulk of the shuttle on the backs of his legs.

wardab8

The portrait here is pretty amazing too. Some have commented that he has an Optimus Prime vibe going on, and there are certainly those similiarities. Nonetheless, the faceplate and helmet are certainly reminiscent of the G1 Blast-Off. Of course, the best thing about this guy’s mug is the incredibly effective light piping in the visor. It’s one of the best executions of the gimmick I’ve seen. And while we’re on the subject of translucent purple plastic, I really dig the use of it on Air Burst’s chest plate. It’s there to serve as a hatch for his combiner port and it really dresses up the figure beautifully. I just wish there were a bigger spot on it to place a Decepticon emblem. I haven’t decided yet where I’m going to go with that.

wardab10

At just under $90, Air Burst is a pretty great value, especially when you figure in how sizeable he is. He stands right between MMC’s Feralcons and TFC’s Uranos Jets, which puts him right in line with a decent Voyager Class figure, so he should look right at home in a lot of different Transformers displays. I love his chunky design and the engineering is simple but effective. I’m not attempting the arm mode until I have a full set, but some fans are pointing out that the final arm mode is not nearly as clean as the one proffered in the prototype. Honestly, that doesn’t bother me, because I buy these teams primarily for their individual bot modes. I’ll just have to judge the Warbotron gestalt mode when I get the whole set. The next one, Not-Swindle is due out sometime this month, and i’ am super excited for him. Swindle’s one of my favorite Decepticons and if he turns out as good as Air Burst, he’s going to be downright amazing.

Feral Rex (Reformatted Series): R-04 Leo Dux (Squadron Commander) by Mastermind Creations

I’ve got two complete third-party combiners under my belt (TFC’s Uranos and Fansproject’s M3) and I love them both. So, it really means something for me to say that Mastermind Creations has been turning out the absolute best contenders in this field with their Feralcons. Bovis and Fortis are absolutely superb and now it’s time to check out their commander, Leo Dux (aka Not-Razorclaw). I split up the last two Feralcons into two features each, but I’m going to get to all of Leo in one shot, so let’s dig right in.

leod1

The packaging is the same style we’ve seen with the previous two releases. Pay no attention to the R-04 number, because MMC has mixed up the order on these figures and Leo is indeed only the third release in the series. The figure comes in a pretty standard box with an opening front flap and a window that shows off the figure in robot form. I’m on record as not being terribly impressed with the presentation here. It’s not bad, it’s certainly collector friendly, but I don’t think the renders they use for character art do the actual figure any justice at all. In the end, I think it just comes down to my personal taste. Considering that being underwhelmed by the box art is the worst thing I’ll have to say in this entire feature, that’s a pretty good thing.

leod2

In addition to the figure, you get Leo’s gigantic twin swords and some extra parts used for a few different things. Of course, also included are the ubiquitous profile card and a combination instruction booklet and comic book all in color. And lastly there’s a baggie of button batteries to be installed in Feral Rex’s head for a light up visor. I’m going to go ahead and start with Leo Dux’s alt mode.

ldux5

ldux8

Yes, he’s a giant robot lion and a mighty awesome one at that. The aesthetic here is right in line with the beast modes of Bovis and Fortis creating a definite continuity of style. The color palette is mostly black with some yellow and red and is mostly achieved through colored plastic with some gold paint to add some zing. ZING! While he may not quite rival the chunky brute force of Bovis and Fortis’ beast modes, Leo Dux is still a beefy and powerful looking cyber-beastie. The transformation doesn’t hold many surprises and I love the fact that he doesn’t look like a robot standing on all fours and imitating a lion, like a certain other third-party homage to Razorclaw. Sorry, TFC, I calls it likes I sees it. Leo is nicely proportioned and thanks to the articulation in his legs you can get some cool poses out of him, which include everything from sitting to pouncing and running. But mostly I just like to stand him majestically. And speaking of majestic that best describes this guy’s superb lion head. He’s an angry looking kitty with intimidating red eyes and an articulated mouth that shows plenty of teeth. The mane is comprised of a series of orange blades with some snazzy gold paint on the front.

ldux9

ldux2

The extra parts that came in the box are combined to complete the lion mode. Two pieces join together to fill in the lion’s breast cavity. The other parts combine to form his tail. If I had to choose something to nitpick here, I guess it would be the tail. It looks fine, but with only two points of articulation it’s very angular and stiff. Then again, maybe that’s what a robotic lion’s tail is supposed to look like.

ldux7

Leo Dux’s lion mode is rocking two laser cannons on his back, which peek out just over his mane. These can also be deployed in an elevated position to give him a better range of firepower. Lastly, you can peg his massive swords into the sockets on his rear legs to give him some side blades. I didn’t think I would dig this as much as I do. It doesn’t make much sense, but it sure does look badass. I mean, he’s a freaking lion with giant blades coming out of him. YEAH! I also appreciate the fact that, like Bovis and Fortis, you can display Leo in lion mode without any leftover parts.

ldux10

ldux11

Transforming Leo Dux into his robot mode is quite straightforward and it feels just a bit easier than transforming Fortis and Bovis. In fact, the most fiddly thing about it for me was getting his lion mane packed up just right. As with his fellow Feralcons the plastic is incredibly high quality so there are no scary or precarious manipulations. When all is said and done, you’re left with an absolutely stunning figure. I literally love every little thing about this guy, from the way his lion head sits on his chest to the way the guns rise up from behind his back. And look at that head sculpt. It’s pure love. That is if love was a cold-blooded Decepticon. Leo is also a satisfyingly large figure, standing a good head and shoulders above Bovis and Fortis, and that’s not even counting his guns, which can also be angled forward into a firing position.

ldux12

Leo’s colors even out a lot more in robot mode than in his beast mode where black dominated. Here he uses a pleasing mix of mostly yellow, red, and black plastics to give him his striking deco. The shades match perfectly with Bovis and Fortis and he brings some nice matte gold paint to the table to make him distinctive. Because of all the colorful plastic, there isn’t an overabundance of paint operations, but what’s here is clean and tastefully done.

leod5

leod3

As with Bovis and Fortis, Leo Dux makes use of all the parts in whatever mode he’s in. The tail and chest pieces all combine together to form a mace. I’ll admit, this is not the most exciting weapon, but there’s nothing wrong with it either and I give MMC points for trying. The two swords can be wielded in each hand or they can be combined together to form one big ass sword. Lastly, the back cannon can be removed and used as arm cannons if you so desire. And seeing as how Leo doesn’t come with any handguns, the option to mount the cannons on his arms is a very welcome feature.

ldux13

leod4

While I now have enough parts to build the legs and torso of Feral Rex, I’m going to keep with tradition and save that until I have a complete set. Besides, this feature has gone long enough today, so I’m going to wrap things up. Suffice it to say, I’ve been blown away by MMC’s Feralcons from Day One and here we are three figures in and this set seems to keep getting better. The quality, the engineering, and the fun of these figures all delight me to no end. I’ll go one further than that: Right now Leo, Bovis and Fortis are without a doubt three of my favorite figures in my Transformers collection and that’s saying a lot. I’m even more excited about the last two, Talon and Tigris, just because they’ll each represent unique molds and add a greater dynamic to the team.

Master Mini Series: Stax “Warrior” (MM-2) by X-Transbots

As promised last week, I’m back to check out the second figure in X-Transbots Master Mini Series, Stax, or “Not-Pipes” if you prefer. This figure is a remold and repaint of Krank (“Not-Huffer”) and the two figures were available at many online retailers as a pair. Because the two figures have so much in common, I’m going to be referring back to my feature on Krank quite a bit, so if you haven’t read it, you may want to do so before moving on. Getting Stax was a big part of what swayed me into going with Krank over Cubex’s Huff, and now that I’ve spent some quality time with both figures, I’m pretty comfortable with that decision.

mm2stax15

mm2stax16

Apart from the new character art, Stax’s box is identical to what we got with Krank. The front is heavily influenced by Takara’s Masterpiece packaging and the back is made to mimic the old G1 style boxes right down to the Tech Spec. The box is sealed with a simple piece of tape and the whole thing is totally collector friendly.

mm2stax17

The inner tray is set up identically to Krank’s as well. You get Stax in his alt mode and his accessories spread out beside him. You still have to attach the mirrors and yes I still had to do a little shaving to get them to fit. But once they’re in, they’re in and you can return the truck to the tray without having to risk taking them out. I also experienced the same tight fit while putting in Stax’s exhaust pipes, but after the first time, they go back in quite easily so they can be removed for transformation without any worries. You also get a folded instruction sheet and a pretty forgettable profile card.

mm2stax9

mm2stax11

If you read my feature on Krank then you know almost all there is to know about Stax’s alt mode. Apart from the new deco the only overt difference here are the remolded exhaust pipes. Krank’s flared out at the tops and Stax’s do not. The deco here is quite attractive and again favors colored plastic over a lot of paintwork. The chrome is all still there and it looks even more striking against the darker blue of the rest of the toy. Granted, the original G1 Huffer and Pipes had more differences in their alt modes, but overall I’m Ok with what we’ve got here, mainly because there are plenty of differences in the robot modes.

mm2stax12

mm2stax10

The transformation is almost identical between the two figures. The only obvious difference is the way you swing Stax’s cab shell around and lock it onto his back so that the back of the cab is facing out. It is worth noting that you can also position the shell on Stax the same way as on Krank if you want to. Stax’s cab does jut out farther than Krank’s, but it doesn’t affect the balance of the figure at all. There are a couple of things worth noting on the transformation and both involve the newly sculpted upper arms. First, they are a little harder to pack away when changing him back into truck mode. Second, the ball joints in the shoulders really like to pop out during transformation. I’m not sure if that’s a design flaw or unique to my figure, but it happens almost every time. On the plus side, it only happens during transformation and not when I’m posing the figure.

mm2stax1

mm2stax2

And yes, in robot mode, Stax features plenty of new sculpting to make him stand out from his brother, Krank. The entire chest piece is entirely redesigned, while the legs and forearms are all borrowed from Krank. The faked out wheels on the shoulders are a nice touch. Sure, they’re obviously smaller than the actual truck wheels, but I chalk that up to the magic of animated mass-shifting. While Krank featured two complete faces, Stax’s alternate portrait is a lot more subtle. You can choose between two eyes or a single visor. I prefer the visor look, although there isn’t a profound difference between the two looks.

mm2stax4

mm2stax3

The official way to put on Stax’s exhaust pipes configures them as arm guns. It makes for another nice bit of variety between the molds, but the back of the pipe tends to mess with the elbow articulation, so I’ve been putting them on the same as Krank’s.

mm2stax6

mm2stax7

mm2stax8

mm2stax5

Stax comes with the same two guns as Krank. They tab securely into the figure’s hands and he looks absolutely bad-ass wielding them. I like to keep Krank with just a single gun and let Stax here brandish the pair of them. One thing I neglected to point out with Krank is that the exhaust pipes can also be combined with the gun to make a beefier weapon. It’s nice to have options, but I’m not real keen on using the pipes this way.

mm2stax14

mm2stax13

mm2stax18

mm2stax19

mm2stax20

staxkrank

Even though I had a huge collection of Transformers as a kid, I never owned a G1 Pipes figure, so I’m very happy to finally own this amazing treatment of the character. I’d say the chances of him making it to an official Masterpiece line at this point are pretty slim, which makes this third-party version all the better. Stax has a few minor flubs that keep him from being perfect, but he’s still a great example of how to tweak a mold into a new character. At about $120 for the pair, I’m quite pleased with what I got. They look fantastic on my Masterpiece shelf and I’m definitely glad I took this leap of faith with X-Transbots. I believe their next project is to work this mold into a Gobots homage, which is a cool idea, but not one I’m likely to spend the dough on. On the other hand, they’re also working on a Not-Wheelie, and I’m rather interested to see how that turns out.

Master Mini Series: Krank “Construction Engineer” (MM-1) by X-Transbots!

Today we’re checking out a third-party Transformer from what I thought to be an otherwise untested company. A little research, however, showed me that they’ve already dabbled in this kind of stuff a few times with upgrade kits. Nonetheless, the first project of X-Transbots that caught my eye was Krank, a transforming robot that some might say bears a slight resemblance to a certain G1 Autobot named Huffer.  I’m sure that’s a complete coincidence. I was extremely excited for this release because Huffer was one of my favorite Minibot characters. I can’t remember much of anything from the old G1 Autobot Tech Specs, but I’ve never forgotten the line in Huffer’s that tells us he sees the world through sludge-covered windshields. I found that line to be oddly poetic for a bio on a toy box and on some level I must have related to it. Anyway, Huffer actually has two third-party homages shipping right now, the other being Cubex’s Huff, and both of them looked quite good. It was a tough decision, but I ultimately decided to go with this one. Let’s see if it was the right call…

xtkrank1

Krank comes in a simple box that is most certainly designed to mimic Takara’s Masterpiece packages. The front has shots of the toy in both robot and alt mode and the layout sure looks familiar. The artwork is rather washed out and overall the package doesn’t pop like some of the stuff we’ve been seeing from other third-party companies, but it’s not bad.

xtkrank2

I find the back panel to be a lot more appealing as it recreates the style of Hasbro’s old G1 boxes right down to the Tech Spec. Very cool! You don’t actually get the red decorder strip for his attributes bar, so you may want to bust out one of your G1 decoders and see if it works. The bio tells us that Krank is a real downer, just like his G1 Hasbro counterpart. He’s also a brilliant engineer, which is something else they have in common!

xtkrank3

Inside this collector friendly box you get a clear plastic tray with Krank in his alt mode and some parts off to the side. The extra bits include his weapons, his mirrors, and his exhaust pipes. The mirrors peg into the sides of the cab and there’s no reason to take them out again once they’re in. The toy will even fit back into the tray once their installed as you can see in the picture above. It’s a good thing too because they are very thin and I wouldn’t want to risk breaking them by pulling them out again. The pegs on mine required me to shave a little mold flashing off before they would go in. The exhaust pipes, on the other hand, do need to come out when you turn him into his robot mode. These were a total bitch to get in the first time. I had to do a lot of twisting and coaxing. Doing so stripped also stripped a little chrome from the pegs. Not a big deal, because the peg is always going to be concealed. I’m happy to report that it was only that first time where these pieces gave me a problem. 

xtkrank4

Krank also comes with a folded instruction sheet and a profile card. The instructions are quite good and feature not only illustrations but some notes to help you along. Chances are most experienced Transformers fans will be able to change Krank without the need of instructions, but I find it’s usually a good idea to consult them on the first go, especially when we’re talking about a $65 figure. The profile card has become a staple accessory for just about every third-party Transformer these days. The one that comes with Krank is not one of the better ones I’ve seen. But who cares about profile cards anyway? Let’s get to the toy…

xtkrank5

xtkrank6

As expected, Krank’s alt mode is an orange semi cab trailer and not a bad looking one at that. There’s very little paintwork here as the toy relies on colored plastic and the chrome… Oh, the chrome! It’s the first thing that struck me about this toy when I saw the initial pictures and in person it’s even more glorious. There’s no doubt that chrome parts have their disadvantages. I have an entire tote full of old Kenner MASK toys that will illustrate how it doesn’t tend to age well. Still, I love the way it looks and I lament the fact that Takara didn’t include at least some chrome parts where appropriate on their MP cars. And the beautiful thing about Krank is there’s even more chrome hiding away for his robot mode. I won’t be rough housing with this toy, so I’m not terribly worried about the chrome wearing.

xtkrank7

As far as the design and sculpt go, Krank sports a great amount of detail for a toy this size. Some of those little details include the door handles, windshield wipers,  and textured steps. Krank also features a working hitch that is slotted to carry MP-10’s trailer. Some day, if MP-10 ever creeps down below $300 again, I may get to test that out. On cursory glance, there really isn’t a lot to betray him as a transforming vehicle, unless you pick him up and look underneath and then you can see it all. One nice surprise for me was that the windows are all tinted clear plastic. Until I had the toy in hand, I presumed the windows were just painted black. They’re also tinted just enough to keep you from seeing what’s going on inside too clearly. As far as accuracy to the G1 toy or Sunbow character goes, X-T took the most liberties with the wheels. The original toy always had wheels that stuck out of the sides. X-T just prettied it up by adding shrouds over them. All in all this is an excellent looking cab.

xtkrank8

xtkrank9

The plastic quality here is good, but it’s not as solid as what we’ve seen used in recent efforts from Fansproject or MMC. I’d rate it closer to the plastic used by TFC for Uranos. It doesn’t feel cheap, but just a little closer to model plastic or Takara’s MP plastic than the hardcore rough-and-tumble toy stuff. QC in this mode is overall pretty good, although the passenger side rear wheel assembly is a little floppy. It’ll lock in fine when the truck is rolled along, but if you pick it up it has a tendency to flop about.

xtkrank10

Transforming Krank is fairly straight forward. The bulk of the transformation involves unpacking the arms from inside the cab and manipulating the cab shell to lock into place onto Krank’s back. The original G1 toy’s arms were made out of his smoke stacks and obviously Krank’s are faked out to keep the aesthetic looking right. During transformation the stacks are removed and can be clipped onto Krank’s forearms, so while it’s technically cheating, it still maintains the spirit of the original design. The other thing worth mentioning about the transformation is the way the cab shell clips into the shoulders. When you do it right, it’s a secure connection, but a connection that relies on some very small pegs. Clipping it and unclipping it requires a slight bending of the plastic that makes me a little nervous. Keep in mind, I’ve transformed him a half dozen times already and there have been no stress marks in the plastic or other warning signs, so at this point it’s not really a problem, just something to watch out for.

xtkrank11

I dig just about everything about Krank’s robot mode. It presents a nice amalgam of the G1 toy and Sunbow design without shying away from the goofy design elements that make the character so distinctive. Yes, Krank still has a huge truck cab on his back and shrouding his head. It’s cumbersome and awkward, but would it be Huffer if it wasn’t? No it wouldn’t. Besides, even with the cab behind his head, Krank is still a wonderfully balanced figure and stands quite well. The faked out arms still look like they could have come from his smoke stacks after some animation mass-shifting magic. And once again, the chrome looks just gorgeous.

xtkrank15

I do have two little gripes about Krank’s robot mode. The first is extremely minor. The hinged caps on the tops of his shoulders don’t lay flat. I might be able to fix this by shaving some plastic, but since it’s on the chrome parts, I doubt I’ll try because it doesn’t bother me that much. The other is the fact that Krank wears his back tires on his legs. It’s accurate to the G1 toy but not the Sunbow cartoon. It doesn’t look bad at all; in fact I think it works to balance out the bulk of his top half rather nicely. Nonetheless, the fact that Cubex’ Huff was able to avoid showing the wheels on the legs was what made me have to think long and hard over which Not-Huffer to go for. Collectors looking for a truly Sunbow accurate figure may want to check out Huff or wait for a possible MP Huffer from Takara.

xtkrank12

Krank has two portraits thanks to a face-switching gimmick. You get a G1 toy accurate face and a Sunbow accurate face. The Sunbow face was the one that was displayed on my figure when I opened him and that’s the one I’m going to stick with. Unfortunately, it’s also the only one we’re going to see here today. Flipping the face proved to be too stubborn for me to risk doing it without fear of scratching paint off his face with my thumb nail. I’m sure it’s doable, but the Sunbow face is fantastic and I don’t have any incentive to try.

In addition to being incredibly solid in his robot mode, Krank features a wonderful amount of articulation. You get ball joints in the neck, shoulders, hips, and ankles. His arms have double hinged elbows, swivels in the biceps and wrists, and four of his fingers are set on one hinge to grip his guns. His knees are hinged and he can also swivel at the waist. He is loads of fun to pose and I really dig the ball joints in his ankles which keep his feet flat even in wide stances.

xtkrank16

xtkrank14

xtkrank13

He may be an engineer, but Krank is still an Autobot warrior and as such he comes with two guns, which he can wield comfortably in each hand. I prefer to just give him the one and let Stax be the dual-wielder, but more on that when I do my feature on Stax. The guns are chromed and they feature tabs in the handles that peg into Krank’s palms to help secure them into place.

xtkrank17

xtkrank18

Like I said, choosing a third-party Huffer was a really tough decision, but ultimately I went with Krank for a few reasons. First, some in-hand impressions of Cubex suggested he might be overly complex and I’ve seen a few reports that say some of his tabs have a tendency to pop out. Second, I really like Krank’s chrome. I think you could argue that Huff achieves a cleaner and more Sunbow style look, but now that I’ve had Krank in hand and have been playing around with him for a week or so, I have zero regrets. He’s refreshingly simple and fun to transform and I can’t argue with how great he looks in robot and truck modes. I think he scales perfectly with the MP Datsuns, as I’m of the opinion that the MP-style Minibots should be about the same height as the regular Autobot cars. Of course, the fact that I was able to pick him and Stax up as a pair for about $120 made it all the sweeter. This is a quality effort on X-Transbot’s part and I’m looking forward to seeing some more releases from them in the future.

As for Stax, I’ll swing back around to check him out sometime next week.

Causality: CA-13 Diesel and Military Multiplexer Kit by Fansproject, Part 2

Yesterday I looked at Fansproject’s Diesel in his alt mode and basic robot mode, now it’s time to break into the back half of that trailer. Like the Native American hunters of old, Diesel makes use of all parts of the buffalo semi-truck. Our first stop is to cannibalize the back trailer to power up Diesel. Here’s where the fun begins because you have to bust down the trailer into all sorts of parts. All the time I was doing it I kept wondering, “How the hell am I ever going to get this back together again?” The first time I tried, I had one piece that I just couldn’t figure out how to get back into the mix. The second time I tried… well, the same thing happened. The third time was the charm and I figured out what I was doing wrong. Now I can practically rebuild that trailer in my sleep.

fpdiesel24

fpdiesel25

Diesel’s Powered Up mode basically consists of him wearing parts of his trailer as additional armor and weapons. It gets broken down and rebuilt into four parts. Two of these become weapon pods that go on his shoulders. Each one has a set of quad-barreled blasters with four missiles above them and a smaller quad-rocket pack on each side. It’s safe to say that Diesel can lay down a ridiculous amount of fire without even trying. I like these things a lot, as they look intentional, rather than a convenient way to stick extra parts on him. I don’t think they’re every day walking around weapons, but rather Sunday Best for when he has a special battle to show up to and wants to present himself well.

fpdiesel22

The other two parts of the trailer just clip onto Diesel’s shoulders via the combiner ports. Unlike the shoulder weapons, these do look like just a convenient way to stick extra parts on him. They don’t really serve any purpose other than to bulk him out and so you can say, “Hey, look he really does use all his parts!” Honestly, they don’t look as bad as I thought they would, but I’m sure I will never display him with those on ever again. Assuming you give him his gun, that just leaves the parts to make M3’s sword. The sword is too big for Diesel to sensibly wield even in this Powered Up mode. He can, however, wear it on his back. The instructions are a little vague on this point, so I haven’t figured it out yet. I’m content with just placing it aside for now.

fpdiesel23

Powered up modes are all well and good, but let’s face it, the real attraction here is “The-Robot-That-Shall-Not-Be-Called-Menasor!” While the Motor Squad’s combined mode has often been referred to as Intimidator, I don’t see any mention of that name on the package or in the instructions. Instead, he’s just known as the Motor Squad Military Multiplexer, or M3. I’ve only formed M3 one time so far, and it was a total bitch. It should get easier after a couple more tries, but it was quite the chore and I’m going to let a little time go by before I try it again. Basically, Diesel transforms into the torso, head, and upper legs. The trailer parts form the framework for the legs with Car Crash and T-Bone basically just stuck on in their car modes. Downshift and Last Chance are than transformed into the arms, with trailer parts used to form the shoulders, hands, and to fill out the gap in Last Chance. It’s a daunting task to get through it, but it’s hard to complain when the end result looks like this…

fpdiesel29

fpdiesel21

M3 is absolutely gorgeous and he’s a lot bigger than I expected him to be. A lot of the added height comes from the fact that his lower legs are built from his trailer and the cars are just stuck on to bulk him out. That’s not a complaint. Quite the contrary, the way he’s designed makes for a remarkably stable combiner. The feet are broad and ball jointed to give him the ability to achieve a flat and wide stance. The legs do, however, represent the biggest design departure from the original G1 character as the cars are on the front and not the back. I have to admit I like having them on the front better.

fpdiesel32

The arms are a tad less stable than the legs. If you manipulate the figure a lot, you may find the arms mis-transforming a bit, but that’s not always the case, and it doesn’t keep him from being a fun figure to play with. The hands feature fully articulated fingers and they hold on really well. I had a lot of fun putting M3 through the paces and didn’t have to worry about bits falling off. The chest piece, formed from the back wheel assembly of the trailer, did pop off once, but only once. The combiner ports use a keyhole method, which locks the limbs in place and releases them again when you turn the slot to line up with the notch. This clever system solves the problem of having to apply a scary amount of force (I’m looking at you, Uranos!) to get them on or off. If you’re applying any degree of force, you aren’t lined up right.

fpdiesel30

Like everything else, M3’s giant sword is cobbled together by pieces of the trailer. The blade comes from two side panels and the point is concealed within. The hilt is stored under the trailer just behind the wheel assembly. Like everything else in this set, it’s a brilliant piece of parts-forming design. There’s a long tab on the hilt, which pegs tightly into M3’s fist, which allows him to hold it perfectly.

fpdiesel31

Like TFC’s Uranos, I mainly bought the Motor Squad to display as a team in their original robot modes. Now that I’ve spent some time with M3, I’m seriously rethinking that. The combined mode on this guy is just a homerun and I really think it deserves to be shown off. As a kid watching the Sunbow cartoon, I thought the Stunticons were the coolest thing ever, but their figures were so disappointing looking that I never even asked my parents for them. Owning FP’s amazing homage is in a lot of ways like a 20-some year old dream come true. And that brings us to the question of value. All told the Motor Squad set me back about $375 (some retailers are now selling him as a complete set for just a tad more) if you add up the shipping, and I have absolutely no regrets. When considering the amazing amount of work and planning and design that went into these figures on an individual basis as well as their gestalt mode, it’s easy for me to see where all the money went. In terms of the engineering, combining M3 is a bit more involved then I would have liked, but the finished product is probably the best Transformers-style combiner that I’ve ever seen. Of course, that honor may fall before the end of the year as MMC’s Feral Rex is shaping up to be mighty impressive as well.

Causality: CA-13 Diesel and Military Multiplexer Kit by Fansproject, Part 1

It’s hard to believe that it was almost a year ago that I received Car Crash, the first figure in the Motor Squad, Fansproject’s take on the Transformers G1 Stunticon team. It took until the end of the Summer to get the rest of the cars, but the real wait began after that, as the final figure, Diesel hit delays and didn’t land in my hands until about a week ago. Was it worth the wait? Well, today and tomorrow we get to find out. Today I’ll be looking at Diesel in his alt mode and basic robot mode and then tomor1row I’ll circle back around to look at his powered up mode as well as the combined mode of the “Stunt-Driving-Evil-Robots-That-Are-Most-Definitely-Not-Called-Stunticons.”

fpdiesel1

fpdiesel2

The packaging for this line has been a real treat. Each figure has come in a colorful and professional looking window box with some kick ass artwork. Diesel comes in a very similar package, with the key difference being that he’s boxed in his alt mode, whereas the rest of the team came in their robot modes. That may really irk some people, I don’t know. It probably should upset my borderline OCD, but oddly it doesn’t. The toy just looks so good in the package, and I happen to like the fact that if you line up all the car boxes with the side panel artwork out, Diesel’s box fits neatly on top and is almost the exact same length. The front and top panel feature great character artwork, whereas the back panel shows Diesel making use of the M3 Kit in Powered Up form. For whatever reason, Motormaster has always been one of my favorite Decepticons and I can still remember how disappointed I was when I first saw his figure. Woof! Even as a kid, that was a bitter pill. Suffice it to say, I am super excited to get Diesel out of the box and check him out.

fpdiesel4

Diesel comes sandwiched between two clear plastic trays. If you were expecting to see a whole bunch of additional parts inside, you’ll be surprised to find just the truck. The Military Multiplexer Kit is comprised of cannibalized parts of the rear half of Diesel’s trailer leaving no messy combiner pieces to rattle around in a tote when you’re not using them. The fact that Diesel is one self-contained unit is a pretty impressive feat of engineering and design that can’t fully be appreciated until you start building his combined mode and see all the goddamn pieces. Included in the box is a nice color instruction booklet, which includes directions to convert the figure from truck to robot and back, as well as how to form the combined mode. You also get a color profile card.

fpdiesel8

fpdiesel9

fpdiesel10

fpdiesel11

Fansproject did a wonderful job recreating a modern and more detailed version of the original G1 Motormasters’ truck mode. From the black cab with purple windows to the grey trailer with purple striping, this alt mode is almost everything I had hoped it would be. Almost? Sure, I can’t deny that I wish there was a little articulation between the cab and the trailer, but I’m perfectly willing to accept and understand why it isn’t there. The trailer is covered with seams, but the panel lining sculpted into the trailer helps hide a lot of it. On the downside, because of the seams and hinges, I really couldn’t find any place on the sides of the trailer to stick a Decepticon insignia. Nonetheless, despite all the seams and hinges Diesel holds together tightly and he rolls along beautifully on ten wheels. The cluster that is attached to his rear trailer gate can also be removed if you find it too unsightly.

fpdiesel6

fpdiesel5

Diesel’s truck mode scales quite nicely with his four Motor Squad comrades. He’s probably a little smaller than he should be. If his trailer were hollow, you might be able to get one of the cars inside, but not two. I’m willing to be pretty forgiving here, since the size of the figures all had to work with each other for the combined feature. Whatever the case, putting all these vehicles together really conveys the Stunticon vibe that Fansproject was going for.

fpdiesel12

fpdiesel14

As you can see above, Diesel splits apart at the middle of the trailer. The front half forms his robot mode and the back half is the M3 kit that can be used to beef up his robot mode or combine the team together. When split apart, Diesel’s front half still forms a perfectly viable vehicle, somewhat like a box truck. You can even remove the tailgate pieces from the back of the trailer and put it on the back of the shorter half. I can’t imagine ever displaying him this way, but I do like that FP was able to keep the robot contained to the front half of the vehicle. Ok, so I can only admire the alt mode for so long. The truth is I was a little apprehensive about transforming this guy. I’ve heard things. But I’ve got my instruction booklet in hand, so here goes!

fpdiesel13

Nine times out of ten I can figure out how to do a Transformer without help from the instructions. In this case, I gave up pretty quickly and took it step by step. I did this partly because the transformation really is crazy complex, and partly because I didn’t want to try to move something where it shouldn’t and wind up causing stress marks, or worse: Snapping something off. Overall the quality of the plastic feels great here, but there is one hinged arm that connects the torso to the pelvis that worries me. The toy places a lot of responsibility on that poor little arm, plus it is required to rotate along a little peg and requires some force to move it. Forcing it hasn’t caused any stress marks, but the first couple of times doing it, I held my breath. Truthfully, it’s the bottom half of Diesel that gave me the most trouble, particularly the lower legs and ankles. Once I got him into robot mode, I was able to reverse it with only a few glances at the book and going back again to robot mode was much easier the second time around. Diesel features some very clever engineering, but he’s very complex and has a ton of moving parts. I can’t even begin to imagine the process that went into designing him.

fpdiesel17

fpdiesel20

When you’re done you get a very cool looking robot mode that includes some solid references to the original G1 toy design. The black and dark grey deco fits him nicely and there’s a little metallic silver and purple and yellow to make him pop. The grey metal finish is so convincing that parts of him really look like diecast when they are indeed all plastic.  It’s great that FP was able to keep the split cab front on the legs, especially with how neatly they wrap around the lower legs. Diesel also retains the boxed head design of the original Motormaster. The head sculpt is good, but surprisingly neutral for a Decepticon. Still, it matches the aesthetic FP used for all the Motor Squad. The official transformation has the combiner ports angled out on his shoulders, and while it adds a bit of flare, it’s obvious that they’re combiner ports, so I prefer to leave them tucked in.

fpdiesel18

While Diesel is mostly a pretty clean robot, he wear his trailer folded up into wings that come off his back. Both pieces are ball jointed, so you can usually get them out of the way when posing the figure. Plus, Diesel is a fairly husky robot, so the trailer wings are mostly concealed when viewing him from the front. I thought these would be a potential problem, but they’re really not. Of course, since they are set on ball joints you can just pop them off the figure if you really don’t like them, but I think that’s cheating.

fpdiesel19

Diesel features a lot of serviceable articulation. The shoulders swivel and feature lateral movement, although they do tend to push the chest plate out, so it’s a good idea to hold in place with a finger when making drastic movements with the arms. There are also swivels just below the shoulder, but these can only be used if you display Diesel with the combiner ports angled out. I prefer to lose the swivel and keep them tucked in. His elbows are double-hinged and while they seem to butt up against the back panels hanging off the backs of the shoulders, those pieces are hinged to prevent it. The wrists also swivel. The hips feature solid ratchets that offer lateral and forward movement as well as swivels. The pelvic plates are hinged to accommodate the leg movement. The knees are hinged and the ankles are ball jointed allowing for wide stances, and the feet include a clever post that allows the leg to rest on it and support the figure.  Lastly, the head is ball jointed and the figure can swivel at the waist.

fpdiesel15

fpdiesel16

fpdiesel3

The only piece of Diesel’s M3 Kit that you need for his basic robot mode is his trailer door and the thing stuck to it. This entire assembly breaks down and gets rebuilt as Diesel’s big gun. Again, another example of some really impressive engineering. One of the pegs that hold it into the back tailgate was broken off, but obviously Fansproject new this was a problem because my order contained a baggie with a brand new replacement part. The broken part was still perfectly useable, but it’s nice that they went ahead and took care of this, particularly when the figure costs so much.

fpdiesel27

fpdiesel28

Diesel is not quite twice as tall as his fellow Motor Squad robots, which jives quite well with the scaling of the original G1 Hasbro team. He also scales very well with Fansproject’s Function-X series and stands about a head taller than those figures. As someone who expected to display him in his basic robot mode with the rest of the team, I couldn’t be happier with how he turned out. Aesthetically, I find Diesel to be a near perfect update to old Motormaster and he looks absolutlely stunning when displayed with the rest of his team. But at $120-150, Diesel needs to do a lot more than form a nice Voyager sized robot, so tomorrow I’ll be back to bust into his trailer and take a look at his Powered Up mode as well as the entire team combined into their M3 gestalt form!

Feral Rex (Reformatted Series): R-05 Fortis by Mastermind Creations

Back in October MMC wowed me with their release of Bovis, the first figure in their take on the Predacons. “Not-Tantrum” was a big beefy figure with some very clever engineering, a fair amount of weapon layout options, and an all-around beautiful update to the character. Just about all of that can also be said about their second release, Fortis, which landed on my doorstep a couple of weeks ago. I’ve finally had time to open up “Not-Headstrong” and I’m almost just as smitten with this figure. I took two installments to cover Bovis, but since we’ve already been introduced to the packaging and presentation of this line, and since Fortis shares the same engineering as Bovis, I should be able to tackle this mechanical rhino in just one day. Besides, I already have a two-parter planned for this week.

mmcfortis3

mmcfortis1

Fortis comes in a large box with a front flap that opens to reveal a window, which in turn shows off the figure in his robot mode. It’s the same deco as we saw used for the last release only with new character art. I seem to recall being a little underwhelmed with the deco the first time around, and I haven’t really warmed up to it any. There’s nothing specifically wrong with it, quite the contrary, it’s a nice collector friendly box, and the flap that protects the window is appreciated. I guess, I’m just not feeling it from an artistic standpoint. I’d rate the presentation here higher than Toyworld’s , but not in league with TFC’s Uranos or most of what Fansproject has done. But in the end it all comes down to personal taste, so your mileage may vary.

mmcfortis2

mmcfortis4

Inside the box you get an illustrated cardboard tray that holds a clear plastic tray. Fortis has all his gear laid out beside him, including the massive foot and hand combiner part, which doubles as his BFG in rhino mode or backpack in robot mode. You also see the first piece of evidence here pointing to what a great company MMC is and how they listen to and care about their customers. There were some isolated instances of paint rubbing on Bovis while he was in the package, so Fortis comes with an extra piece of plastic taped over the tray to keep him from rubbing on the front tray. Classy!

mmcfortis5

In addition to the figure and accessories you also get a baggie containing a nice profile card and the instruction booklet-slash-comic book. And here comes the second piece of evidence of MMC’s caring nature. There were some instances of over tightened screws causing Bovis’ pelvis to show cracks or stress marks. Inside this baggie you get a replacement pelvis for that figure. You’d have to bum around some message boards to know why this was included, because there’s no documentation of it in the box. I quickly inspected my Bovis’ hinder to see if I had any problems, but so far I could not detect a crack in his ass. Last time I broke tradition and started out with Bovis’ robot mode, but this time I’m going start out with Fortis’ rhino mode.

mmcfortis8

mmcfortis9

As both Fortis and Bovis are going to form Feral Rex’s legs, it’s only natural that they would share much of the same body and engineering. Nowhere is this more obvious than in their animal modes. There are plenty of remolded parts on Fortis, but the limbs and back section of the animals are nearly identical with only the remolded front section, new head, and the rather drastic new color scheme to set them apart. I’m totally cool with that as it’s expected with combiners and the mostly shared body works fine for the rhino and bull alt forms. Fortis’ head is smaller than Bovis’ but it still sports that great angular cyber-animal sculpt. The single horn is painted black and I really dig the silver grill pieces on his cheek plates. As with Bovis, Fortis’ jaw can open and close, but if you look underneath you’ll see his robot face peeking back out at you.

mmcfortis7

The coloring on this guy is right in line with the original G1 Headstrong toy and that means that it’s a lot more obnoxious than the red and orange of Bovis. It uses the same beautiful red plastic as Bovis, only this time it’s paired with bright yellow and black. Initially I wasn’t sure the colors would transfer so well onto the toy, but I believe the finished product’s yellow is a tad duller than initial promo pictures, which I think really help it along. Again, the bulk of the toy’s coloring comes from the actual plastic, which is always a good thing to me, although there is some silver paint detailing here and there to help make the figure pop a little more.

mmcfortis22

mmcfortis10

As with Bovis, Fortis’ weapons can all be attached to his beast mode. There are pegs on the “shoulders” of all four legs for his guns and knives and you can attach his massive cannon onto the back to make him look all the more formidable. 

mmcfortis11

mmcfortis12

Fortis transforms exactly the same as Bovis, so if you’ve had that figure around the block a couple of times you should be good to go here. I haven’t transformed him since October, so it took me a little fumbling about to get it right. In theory, the transformation is pretty basic. The legs fold out from the back of the rhino and the arms fold out from the front legs. In practice, there’s a lot of extra tucking and folding to deliver on the kind of engineering that you would expect in a $100 toy. The result gives you all that extra articulation and makes certain that all those rhino bits peg in perfectly when you’re in robot mode.

mmcfortis14

mmcfortis13

The reuse from Bovis is most apparent in the limbs, although the recolor and some minor re-sculpting helps to set him apart, at least a little bit. The chest is a completely new design, and while I don’t think it’s quite as interesting as Bovis’ with his silver painted mesh screens, it still looks good and further helps to make Fortis distinctive. The head sculpt, complete with visor and organic looking face, is also quite similar to Bovis, which is probably what surprised me the most about this figure. Of course, then I referenced back to the original toys and found that the similarities existed back there as well.

mmcfortis15

mmcfortis16

Fortis features some new weapons. His guns are basically just boxes with little barrels on them. I wasn’t too keen on them at first, but I’ve warmed up to them quite a bit. He can hold them in his hands or they can be clipped onto his forearms. He also has a similar set of knives as the ones that came with Bovis.

mmcfortis18

mmcfortis19

mmcfortis17

Naturally, Fortis can also equip the combiner parts as a backpack in his robot mode. It looks pretty good on the figure and adds a great deal more bulk. He’s designed so that he can still stand reasonably well with the huge cannon on his back. He can also wield it in both hands as a weapon of mass destruction. I really dig the fact that even though these combiner parts are freaking huge, they’ve still been worked into the figure. Like Bovis, Fortis can be displayed either holding or wearing every last piece that he comes with and that’s very cool.

mmcfortis21

mmcfortis20

And that’s MMC’s second Feralcon in the bag. He’s another great effort, although I’ll concede I still like Bovis a smidge better. Fortis retailed at right around $100 if you got in on the Early Bird, but only add another $10 if you didn’t. In the realm of third-party Transformers, Fortis is a lot of figure for that price. He’s big and beefy, the plastic quality feels great, and he comes with a good amount of stuff to justify the purchase. Next up in this series should be the Feralcon Commander, Leo Dux, although this line has had its share of delays and slot-switching from the get go so we’ll just have to wait and see what happens next. But that’s fine, with figures this good, I’m willing to wait.