Merry Christmas, everyone! I’m spending this morning on the living room floor, under the tree, in my footie pajamas with a cup of cocoa! Not really. I don’t have a Christmas tree, I’m actually wearing sweatpants and an old T-shirt from a Journey concert, and I’m having an Irish Coffee with extra Jameson to infuse myself with good cheer for the day ahead. But, I might as well be a kid again, because it’s Christmas morning and I’m opening up one of the coolest playsets ever. OK, technically I opened the box a few days ago and checked out the exterior yesterday, but Christmas Eve is all about peaking, right? And today’s the day I get to open up Castle Grayskull and really start playing with it.


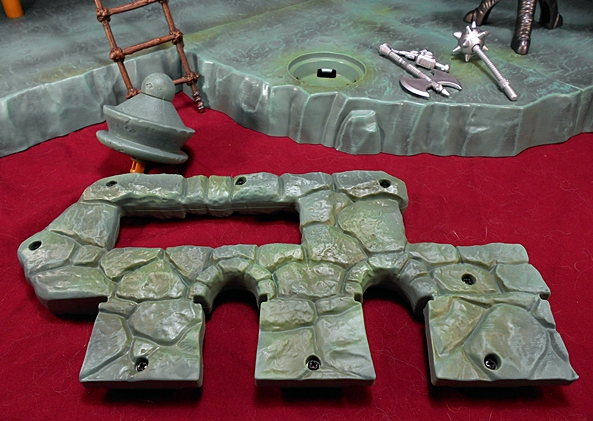
When you first open this sucker up, you’re met with a massive interior and a lot of parts. Parts in bags, parts in cardboard, parts in other bags stuffed in cardboard. There’s a lot here to process, and a giant sheet of instructions to tell you where everything goes and how everything works. The first thing to do is put the three floor pieces down, which locks the playset in this open position and gives you a place for figures to stand, and maybe even a place to park a vehicle, but I’ll come back to that later. There’s so many things to look at here, I’m just going to start on the ground floor and work my way up. But first…
These are pieces that I’m not using. One is a decorative point for the top of the castle and the other is a carry handle, just like the original playset had. I like these, but word is once you put them on, they can be really hard to get off again and I don’t want to risk breaking anything trying to take them off. Why would I want to take them off again? Because Grayskull won’t fit back in the box with these in place and I want to hang onto that option at least until I can find some place to actually display this thing. That may be never, so for now these pieces are being set aside. Now, back to the ground floor…

Naturally, you have the inside of the jawbridge, which can be opened by sticking a sword in a slot and triggering the mechanism. Next to it, there are a couple of places where you can clip shields to hang them on the wall. The set even comes with one to get you started. There’s another, similar set up on the other wall. This one has a sword behind it. The shields look really good on the wall, but if you’ve had them clipped onto your figures’ wrists for a while, it may stretch them out too much for them to stay put here. Also, to the right here you can see that backdoor we saw yesterday from the outside. It’s sculpted to look like it’s reinforced on the inside with a plate of steel.
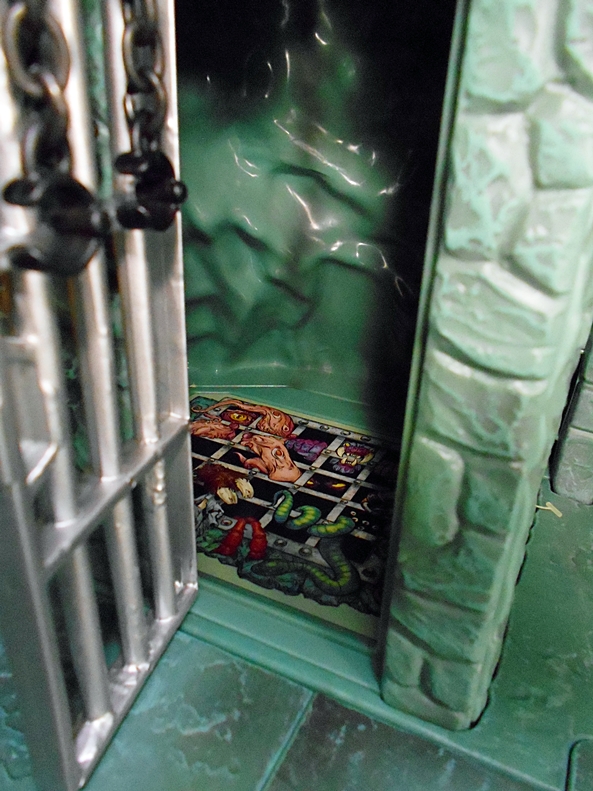
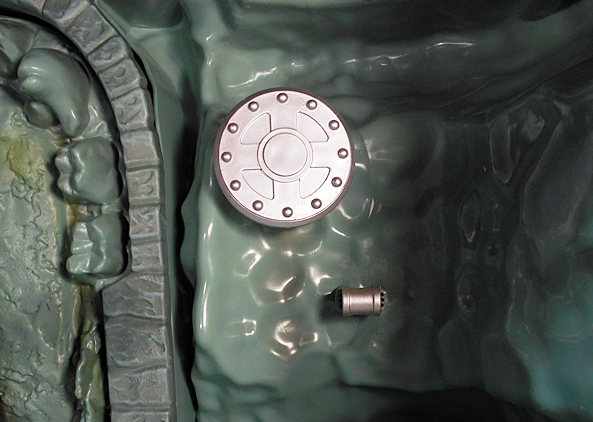
Also down here is this horrible little dungeon with a sticker showing more horrible things locked away under it. For a bunch of good guys, the Masters don’t seem to be very humane to their prisoners. Sure, you can argue that they’re all monsters down there. But let’s face it, this is Eternia, and that sticker might as well be a picture of any Eternian’s family album. The cell door opens and closes and you also get some chains for the prisoners. One of these sets of chains is designed to peg into somewhere… anyone happen to know where that might be, cause I sure don’t!
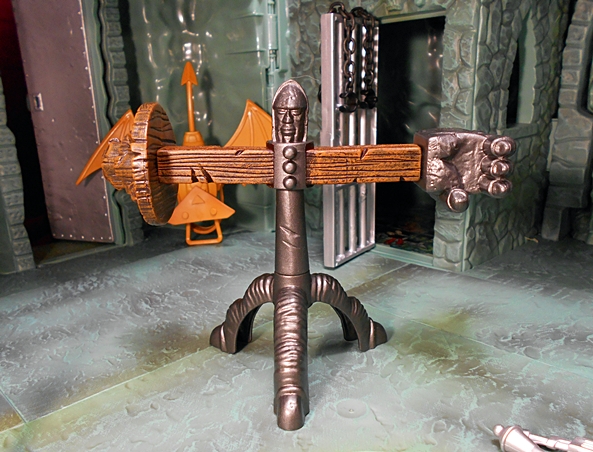
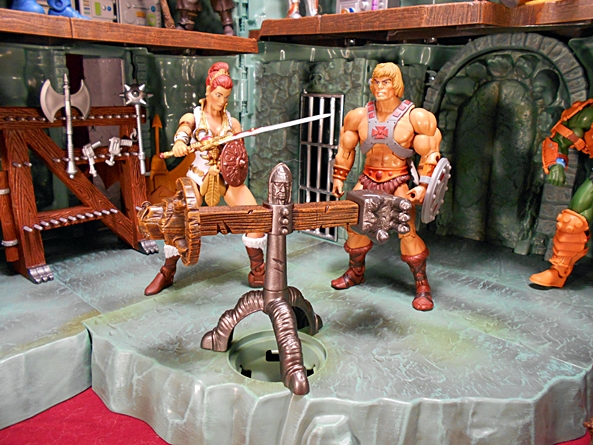
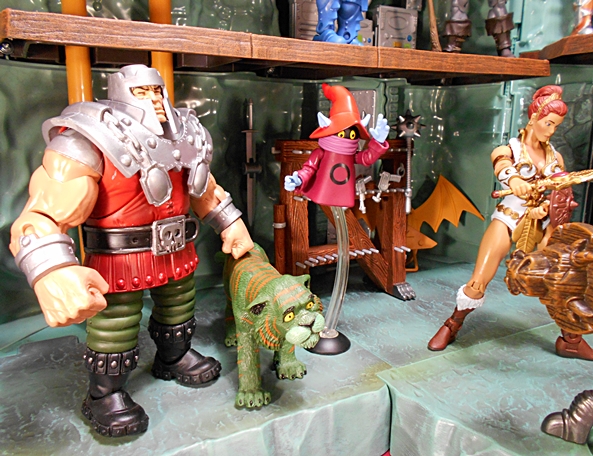
Also down here is this nifty training device. I love the sculpted detail on this thing, especially the ornamental head and the giant hand that’s designed to smack you when you’re trying to hit it. Also check out some of those hack marks in the wood. This is such a beautiful piece!
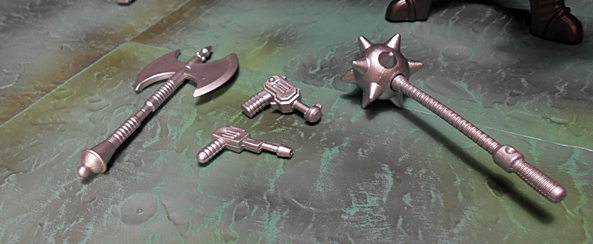
You also get a handful of weapons, including an axe, a mace, and two laser pistols. Now would be a good time to dig out that weapons rack, because it looks fantastic in the corner, and you shouldn’t just leave weapons lying around.
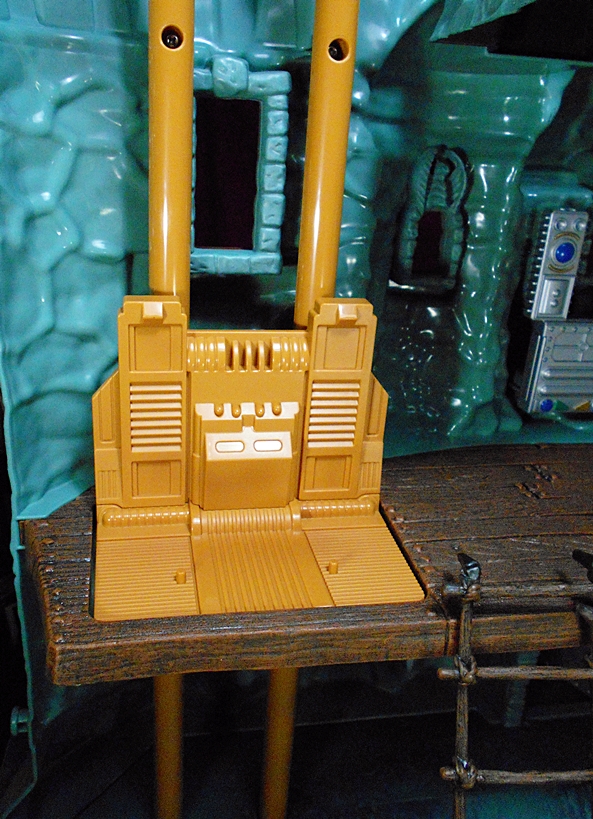
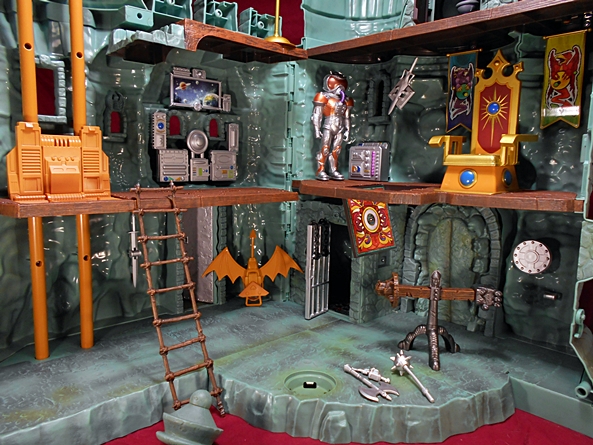
You can climb to the second floor via the ladder or just take the elevator. The lift features pegs for a figures’ feet and it holds strong enough to carry the weight of a figure without sliding back down. At least for now. The second level features more of those lovely sculpted floors.
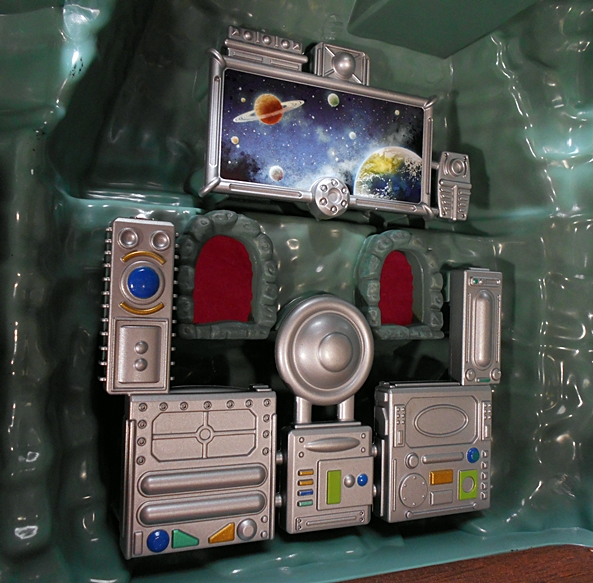
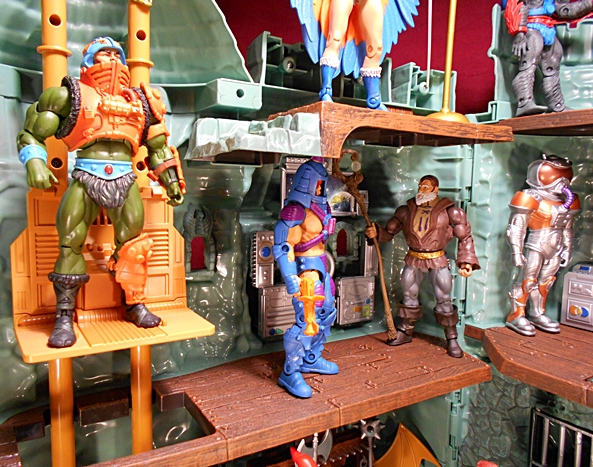
A little further on is this spiffy computer bank with a scanner screen. One of my favorite things about MOTU has always been the melding of fantasy and science fiction, so there’s just something about seeing high tech stuff like this in a medieval style castle really does it for me.
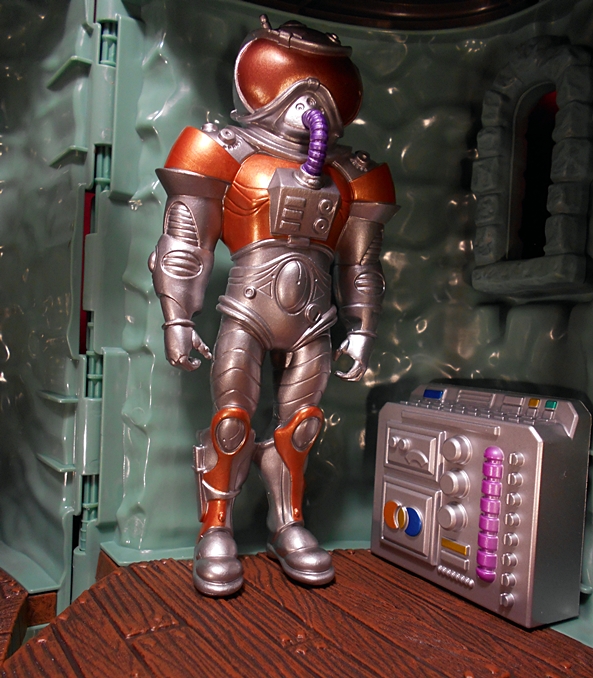
Speaking of which, the next point of interest on our tour is this crazy space armor. It’s a static piece that just pegs into the floor and makes for quite the conversation piece. It’s also positioned next to another hi-tech computer bank. Or that might be Grayskull’s central AC unit. Moving on…
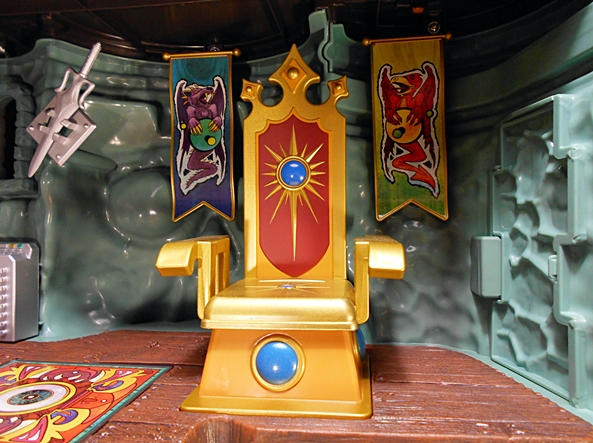
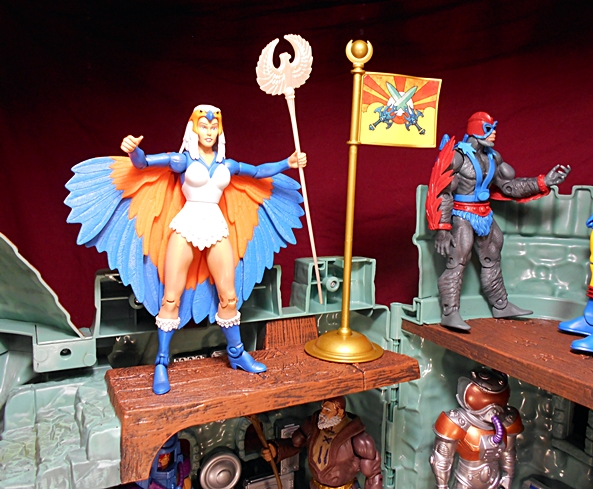
Behold… The Throne of Grayskull. This is a regal chair, indeed. I love the gold paint used on it and the two blue orbs. The starburst on the back looks great too. There’s a lot going on in this picture, so let me break it all down. First off, that sword on the wall up there is removable and you can replace it with most other swords. There are two battle standards that hang down on either side of the throne, and if you look to the right you can see the secret door that leads out to the ledge on the exterior. That’s clearly the “Oh, shit!” door, used to bugger off when the rest of Grayskull’s defenses fail. Oh, yeah… and speaking of defenses, you see that horribly garish rug beside the throne?

Turn the throne and it activates the trap door. I used Tri-Klops to demonstrate, but only now am I realizing that I should have put Trap Jaw down the Trap Door. It would have been poetic. Anyway, I love this thing! It’s very design counts on your enemy besting all your defenses, finding his way into an impenetrable fortress, fighting his way through all your Men-At-Arms, confronting you as you sit on the throne, and then standing there and monologueing like an idiot for long enough for you to activate the trap. How unlikely is that to work? Oh, wait, we’re talking about Skeletor here. Never mind, it’ll work. Unfortunately, when it does work all it does is drop him down a floor and makes him ride the elevator back up again. That’s probably what the “Oh, shit!” door is for.


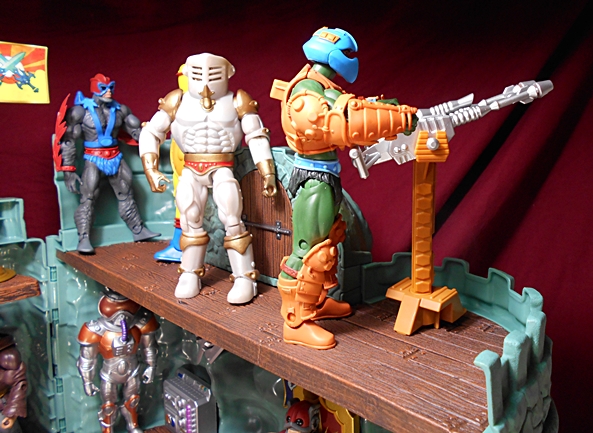
The rooftop level is accessible by the elevator. Here you can admire the flag or open up that little door to reveal whatever the hell this thing is. Seriously, what is it? Anyone know? The instructions are failing me on this one.
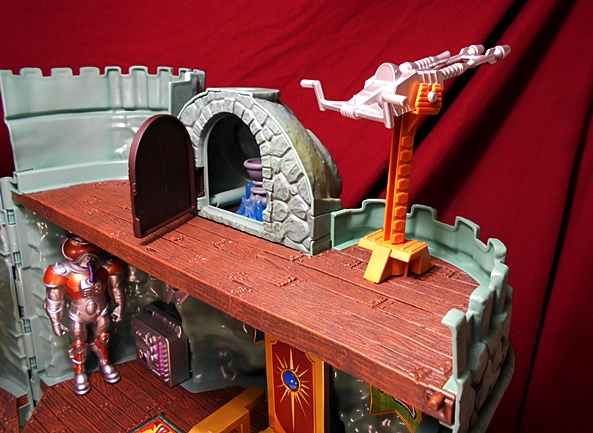
Finally, our last stop on the tour is a mounted laser gun for fending off attacks from Snake Mountain. And if all that isn’t cool enough, back on the ground floor, there’s room to park the Wind Raider!
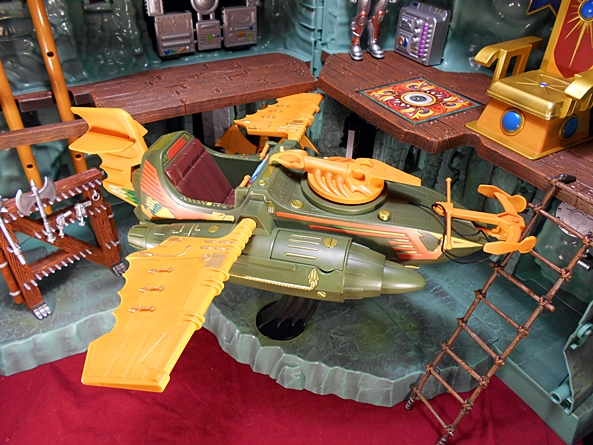
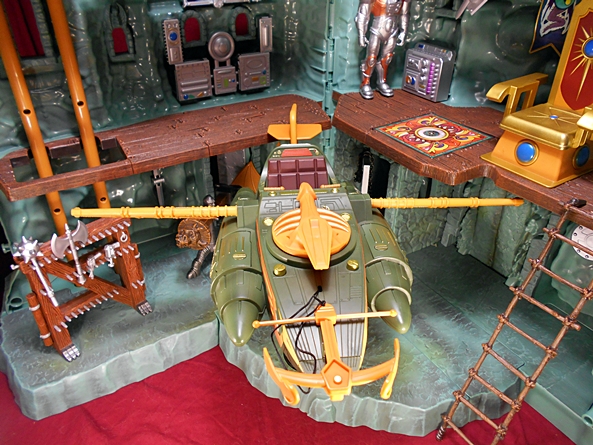
Well, sort of. The circular slot is designed to take the Wind Raider’s stand. And while this beautiful craft does technically fit, it’s a tight squeeze and it eats up a lot of real estate. It also kind of looks like a big albatross and probably cooks anyone locked in the dungeon when it takes off. To be honest, I’d probably be more likely to park it a little further out and off the floor pieces.
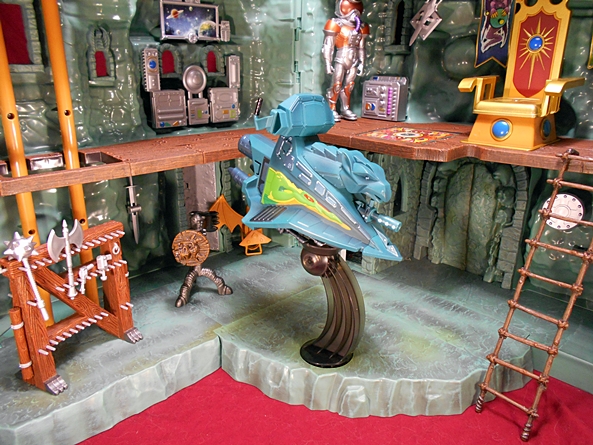
The Sky Sled, on the other hand, is compatible with the same stand and it fits a lot better. hell, even if you want to do away with the stand, there’s plenty of room to tuck this vehicle in here without compromising all your play room. And speaking of playing… this set really starts to shine when you load it up with figures.


In case you haven’t guessed by now, I am absolutely in love with Castle Grayskull. In fact, I love it so much that I almost feel bad that I waited until it was on clearance to buy it. Grayskull originally debuted at $300, which in itself is a huge chunk of change, but that sum inflated even more when you added tax and Matty’s crazy idea of a reasonable shipping rate. When all was said and done, I think it cost around $360 to get this thing shipped out. Back then I couldn’t fit it into the budget, and I cried myself to sleep many a nights (when I was drinking) over the fact that I would never own it. Then last year, Matty blew this beauty out at $150 with free shipping and that made it practically an impulse buy. No regrets!

And thus ends the chronicling of my magical Christmas morning with Castle Grayskull. I really did feel like a kid again while I was setting this up and getting out all my figures to put in it, and hopefully I was able to convey some of that in my ramblings. To me, this is a big part of what Christmas is all about. Remembering happy times of Christmas Past and feeling young at heart again. As to the other part, I’m about to head out to spend the rest of Christmas with my family, eat a lot of great food, come home get drunk and watch the Doctor Who Christmas Special. And that, my friends, is my formula for a perfect Christmas.
Whatever constitutes your Perfect Christmas, I hope you all get it. Have a happy and safe holiday and I’ll see you on tomorrow for Marvel Monday!

Hi UK reader here who loves your site.
The answers to the questions you asked are that the chains peg into a hole on the wall inside the jail cell. It’s small and hard to get in but they go there. I had to use a torch to see it. The orb holder is meant to hold the power of the universe and the orb you are meant to put on it came with the 2nd King Grayskull figure with the removable cape. My fave feature is the key that came with scareglow opens the secret door at the back. I would also watch out for the floor with the throne as some owners found it to sag with figures on it over time. Mine is ok but I’ve been over cautious. It’s an incredible update of the original toy that I had as a kid. I ended up re buying the original after getting this in 2013
Dude, thanks so much for answering those nagging questions, as well as the tip about Scareglow’s key! Cheers!
And, as always, thanks for reading!